Quantcast
Channel: Android Explorations
Viewing all 50 articles
Browse latest View live

ICS Trust Store Implementation

$
0
0
In the previous two posts we looked at the internal implementation of the Android credential storage, and how it is linked to the new KeyChain API introduced in ICS. As briefly mentioned in the second post, there is also a new TrustedCertificateStore class that manages user installed CA certificates. In this entry we will examine how the new trust store is implemented and how it is integrated in the framework and system applications.

Storing user credentials such as passwords and private keys securely is of course essential, but why should we care about the trust store? As the name implies, the trust store determines who we trust when connecting to Internet servers or validating signed messages. While credentials are usually used proactively only when we authenticate to a particular service, the trust store is used every time we connect to a secure server. For example, each time you check GMail, Android connects to Google's severs using SSL and validates their certificates based on the device's trust store. Most users are unaware of this, unless some error occurs. Since the trust store is used practically all the time, and usually in the background, one could argue that it's even more important then credential storage. Up till Android 4.0, the OS trust store was hard wired into the firmware, and users had no control over it whatsoever. Certificates bundled in the store were chosen solely by the device manufacturer or carrier. The only way to make changes was to root your device, re-package the trusted certificates file and replace the original one (instructions from cacert.orghere). That is obviously not too practical, and a major obstacle to using Android in enterprise PKI's. In the wake of major CA's being compromised practically each month this year, tools that make changing the default trusted certificates in place have been developed, but using them still requires a rooted phone. Fortunately, ICS has made managing the trust store much more flexible, and gives the much needed control over who to trust to the user. Let's see what has changed.

Pre-ICS, the trust store was a single file: /system/etc/security/cacerts.bks, a Bouncy Castle (one of the JCE cryptographic providers used in Android) native keystore file. It contains all the CA certificates Android trusts and is used both by system apps such as the email client and browser, and applications developed using the SDK. Since it resides on the read-only system partition, it cannot be changed even by system-level applications. The newly introduced in ICS TrustedCertificateStore class still reads system trusted certificates from /system/etc/security, but adds two new, mutable locations to store CA certificates in /data/misc/keychain: the cacerts-added and cacerts-removed directories. Let's see what's inside:

ls -l /data/misc/keychain
drwxr-xr-x system system 2011-11-30 12:56 cacerts-added
drwxr-xr-x system system 2011-12-02 15:21 cacerts-removed
# ls -l /data/misc/keychain/cacerts-added
ls -l /data/misc/keychain/cacerts-added
-rw-r--r-- system system 653 2011-11-29 18:34 30ef493b.0
-rw-r--r-- system system 815 2011-11-30 12:56 9a8df086.0
# ls -l /data/misc/keychain/cacerts-removed
ls -l /data/misc/keychain/cacerts-removed
-rw-r--r-- system system 1060 2011-12-02 15:21 00673b5b.0

Each file contains one CA certificate. The file names may look familiar: they are hashes of the CA subject names, as used in mod_ssl and other cryptographic software implemented using OpenSSL. This makes it easy to quickly find certificates without scanning the entire store. Also note the permissions of the directories: 
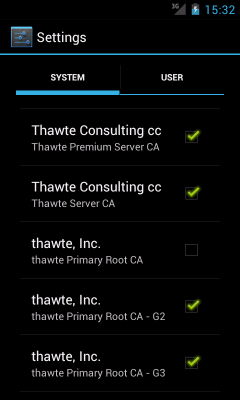
0775 system system guarantees that only the system user is able to add or remove certificates, but anyone can read them. As can be expected, adding trusted CA certificates is implemented by storing the certificate in cacerts-added under the appropriate file name. The two files above, 30ef493b.0 and 9a8df086.0, correspond to the certificates displayed in the 'User' tab of the Trusted credential system application (Settings->Security->Trusted credentials). But how are OS-trusted certificates disabled? Since pre-installed CA certificates are still stored in /system/etc/security (read-only), a CA is marked as not trusted by placing a copy of its certificate in cacerts-removed. Re-enabling is performed by simply removing the file. In this particular case, 00673b5b.0 is the thwate Primary Root CA, shown as disabled in the 'System' tab:


TrustedCertificateStore is not available in the SDK, but it has a wrapper accessible via the standard JCE KeyStore API, TrustedCertificateKeyStoreSpi, that applications can use. Here's how we can use it to get the current list of trusted certificates::

KeyStore ks = KeyStore.getInstance("AndroidCAStore");
ks.load(null, null);
Enumeration aliases = ks.aliases();
while (aliases.hasMoreElements()) {
String alias = aliases.nextElement();
X09Certificate cert = (X509Certificate)
ks.getCertificate(alias);
Log.d(TAG, "Subject DN: " +
cert.getSubjectDN().getName());
Log.d(TAG, "Issuer DN: " +
cert.getIssuerDN().getName());
}

If you examine the output of this code, you would notice that certificate aliases start with either the 
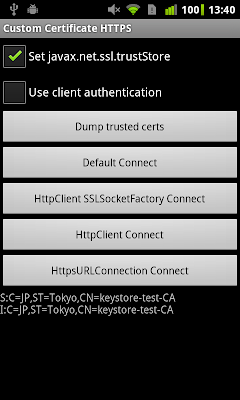
user: (for user installed certificates) or system: (for pre-installed ones) prefix, followed by the subject's hash value. This lets us easily access the OS's trusted certificates, but a real word application would be more interested in whether it should trust a particular server certificate, not what the current trust anchors are. ICS makes this very easy by integrating the TrustedCertificateKeyStoreSpi with Android's JSSE (secure sockets) implementation. The default TrustManagerFactory uses it to get a list of trust anchors, thus automatically validating server certificates against the system's currently trusted certificates. Higher-level code that uses HttpsURLConnection or HttpClient (both built on top of JSSE) should thus just work without needing to worry about creating and initializing a custom SSLSocketFactory. Here's how we can use the TrustManager to validate a certificate issued by a private CA (the CA certificate is already installed in the user trust store).

X509Certificate[] chain = KeyChain.getCertificateChain(ctx,
"keystore-test-ee");
Log.d(TAG, "chain length: " + chain.length);
for (X509Certificate x : chain) {
Log.d(TAG, "Subject DN: "
+ x.getSubjectDN().getName());
Log.d(TAG, "Issuer DN: "
+ x.getIssuerDN().getName());
}

TrustManagerFactory tmf = TrustManagerFactory.getInstance("X509");
tmf.init((KeyStore) null);

TrustManager[] tms = tmf.getTrustManagers();
X509TrustManager xtm = (X509TrustManager) tms[0];
Log.d(TAG, "checking chain with " + xtm);
xtm.checkClientTrusted(chain, "RSA");
Log.d(TAG, "chain is valid");

Works pretty well, but there is one major problem with this code: it does not check revocation. Android's default TrustManager explicitly turns off revocation when validating the certificate chain. So even if the certificate had a valid CDP (CRL distribution point) extension, pointing to a valid CRL, and the certificate was actually revoked, it would still validate fine in Android. What's missing here is the ability to dynamically fetch, cache and update revocation information as needed, based on information available in certificate extensions. Hopefully future version of Android will add this functionality to make Android's PKI support complete.

Of course, system applications such as the browser, email and VPN clients are also taking advantage of the new trust store, so connecting to a corporate Exchange server or a secure Web application should be as easy as installing the appropriate certificates. We'll see how well that works out in practice once I get a real ICS device (shouldn't be too long now...).

That concludes our discussion of the new credential and trust stores introduced in Android 4.0. To sum things up: users can now freely install and remove private keys and trusted certificates, as well as disable pre-installed CA certificates via the Settings app. Third-party applications can also do this via the new KeyChain API, if the user grants the app the necessary permissions. The key and trust stores are fully integrated into the OS, so using standard secure communication and cryptographic Java API's should just work, without the need for applications-specific key stores. A key element required for full PKI support -- revocation checking, is still missing, but the key and trust store functionality added in ICS is a huge step in making Android more secure, flexible and enterprise-friendly.


Hanzi Recognizer v2.0 Released

$
0
0
The latest version is now available in the Android Market. There are no new user visible features, but the  renewed UI and full support for tablets warrant the major version bump.

Hanzi Recognizer now has an app-wide action bar, available both on the newer Ice Cream Sandwich (4.0) and Honeycomb (3.x) Android versions, and on all mainstream Android 2.x versions. Functions previously only accessible via the overflow menu are now easier to use and discover courtesy of the action bar. Here's a screenshot of the app's main screen:


The two icons on the right kick off the keyword (reading or meaning) search and the favorites/history screen, respectively. All other screens have a home icon on the left as well, providing an easy way to get to the main screen from anywhere. Less frequently used activities such as Settings and About are available via the Menu key, as before.

The favorites and history tabbed screen now has a new look, consistent with the Honeycomb and ICS visual style. Changing tabs is also easier: just swipe left or right to switch from favorites to history and vice versa. In addition, the filter and import/export actions are now available on action bar.


On tablets the app uses the larger screen estate to show more information and make browsing characters and compounds easier. Search results or recognition candidates (when not using search on stroke) are displayed on the left, and tapping an item will update the details pane on the right. Here's how the compounds search result screens look on a Honeycomb tablet:


Version 2.0 now requires Android 2.1. Since less than 2% of all installs are on the Android 1.6,  most users won't be affected by this new requirement. Hanzi Recognizer v1.7.2 is still available on the Android Market  for devices running earlier Android versions, but no new features are planned.

Other changes and improvement in version 2.0:
  • Reduced startup time
  • Better error handling and reporting
  • Various optimizations and bug fixes
Finally, the app now has an official Google+ page. Add it to your circles to get the latest news and updates and don't forget to +1 and share.

Using ECDH on Android

$
0
0
Elliptic curve cryptography (ECC) offers equivalent or higher levels of security than the currently widely deployed RSA and Diffie–Hellman (DH) algorithms using much shorter keys. For example, the computational effort  for cryptanalysis of a 160-bit ECC key is roughly equivalent to that of a 1024-bit key (NIST). The shift to ECC has however been fairly slow, mostly due to the added complexity, the need for standardization, and of course, patents. Standards are now available (more than a few, of course) and efficient implementations in both software and dedicated hardware have been developed. This,  along with the constant need for higher security, is pushing the wider adoption of ECC. Let's see if, and how we can use ECC on Android, specifically to perform key exchange using the ECDH (Elliptic Curve Diffie-Hellman) algorithm.

Android uses the Bouncy Castle Java libraries to implement some of its cryptographic functionality. It acts as the default JCE crypto provider, accessible through the java.security and related JCA API's. Bouncy Castle has supported EC for quite some time, and the most recent Android release, 4.0 (Ice Cream Sandwich, ICS), is based on the latest Bouncy Castle version (1.46), so this should be easy, right? Android, however, does not include the full Bouncy Castle library (some algorithms are omitted, presumably to save space), and the bundled version has some Android-specific modifications. Let's see what EC-related algorithms are supported on Android (output is from ICS, version 4.0.1):

BC/BouncyCastle Security Provider v1.46/1.460000
KeyAgreement/ECDH
KeyFactory/EC
KeyPairGenerator/EC
Signature/ECDSA
Signature/NONEwithECDSA
Signature/SHA256WITHECDSA
Signature/SHA384WITHECDSA
Signature/SHA512WITHECDSA

As seen above, it does support EC key generation, ECDH key exchange and ECDSA signatures. That is sufficient to generate EC keys and preform the exchange on the newest Android version, but as it turns out, currently more than 85% of devices are using 2.2 or 2.3. Android 4.0 doesn't even show up in the platform distribution graph. Let's check what is supported on a more mainstream version, such as 2.3 (Gingerbread). The output below is from stock 2.3.6:

BC/BouncyCastle Security Provider v1.45/1.450000

Which is exactly nothing: the JCE provider in Gingerbread is missing all EC-related mechanisms. The solution is, of course, to bundle the full Bouncy Castle library with our app, so that we have all algorithms available. It turns out that it is not that simple, though. Android preloads the framework libraries, including Bouncy Castle, and as a result, if you include the stock library in your project, it won't be properly loaded (you will most likely get a ClassCastException). This appears to have been fixed in 3.0 (Honeycomb) and later versions (they have changed the provider's package name), but not in our target platform (2.3). There are two main solutions to this:
  • use jarjar to rename the Bouncy Castle library package name we bundle
  • use the Spongy Castle library that already does this for us
We'll take the second option, because it's less work and the name sounds funny :) Using the library is pretty straightforward, but do check the Eclipse-specific instructions if you get stuck. Now that we have it set up, let's initialize the provider and see what algorithms it gives us. 

// add the provider
{
Security.addProvider(new org.spongycastle.jce.provider.BouncyCastleProvider());
}

SC/BouncyCastle Security Provider v1.46/1.460000
AlgorithmParameters/SHA1WITHECDSA
...
Cipher/BrokenECIES
Cipher/ECIES
KeyAgreement/ECDH
KeyAgreement/ECDHC
KeyAgreement/ECMQV
KeyFactory/EC
KeyFactory/ECDH
KeyFactory/ECDHC
KeyFactory/ECDSA
KeyFactory/ECGOST3410
KeyFactory/ECMQV
KeyPairGenerator/EC
KeyPairGenerator/ECDH
KeyPairGenerator/ECDHC
KeyPairGenerator/ECDSA
KeyPairGenerator/ECGOST3410
KeyPairGenerator/ECIES
KeyPairGenerator/ECMQV
Mac/DESEDECMAC
Signature/ECDSA
Signature/ECGOST3410
Signature/NONEwithECDSA
Signature/RIPEMD160WITHECDSA
Signature/SHA1WITHCVC-ECDSA
...

This is much, much better. As you have probably noticed, the provider name has also been changed from 'BC' to 'SC' in order not to clash with the platform default. We will use 'SC' in our code, to ensure we are calling the correct crypto provider.

Now that we have a working configuration, let's move on to the actual implementation. JCE makes DH key exchange pretty straightforward: you just need to initialize the KeyAgreement class with the current party's (Alice!) private key, pass the other party's public key (who else but Bob), and call generateSecret() to get the shared secret bytes. To make things a little bit more interesting, we'll try to stimulate a (fairly) realistic example where we use pre-generated keys serialized in the PKCS#8 (for the private key) and X.509 (for the public) formats. We'll also show two ways of initializing the EC crypto system: by using a standard named EC curve, and by initializing the curve using discrete EC domain parameters.

To generate EC keys we need to first specify the required EC domain parameters:
  • an elliptic curve, defined by an elliptic field and the coefficients a and b, 
  • the generator (base point) G and its order n, 
  • and the cofactor h.
Assuming we have the parameters (we use the recommended values from SEC 2) in an instance of a class ECParams called ecp (see sample code) the required code looks like this:

ECFieldFp fp = new ECFieldFp(ecp.getP());
EllipticCurve ec = EllipticCurve(fp, ecp.getA(), ecp.getB());
ECParameterSpec esSpec = new ECParameterSpec(curve, ecp.getG(),
ecp.getN(), ecp.h);
KeyPairGenerator kpg = KeyPairGenerator.getInstance("ECDH", "SC");
kpg.initialize(esSpec);

Of course, since we are using standard curves, we can make this much shorter:

ECGenParameterSpec ecParamSpec = new ECGenParameterSpec("secp224k1");
KeyPairGenerator kpg = KeyPairGenerator.getInstance("ECDH", "SC");
kpg.initialize(ecParamSpec);

Next, we generate Alice's and Bob's key pairs, and save them as Base64 encoded strings in the app's shared preferences (we show only Alice's part, Bob's is identical):

KeyPair kpA = kpg.generateKeyPair();

String pubStr = Crypto.base64Encode(kpA.getPublic().getEncoded());
String privStr = Crypto.base64Encode(kpA.getPrivate().getEncoded());

SharedPreferences.Editor prefsEditor = PreferenceManager
.getDefaultSharedPreferences(this).edit();

prefsEditor.putString("kpA_public", pubStr);
prefsEditor.putString("kpA_private", privStr);
prefsEditor.commit();

If we save the keys as files on external storage as well, it's easy to check the key format using OpenSSL:

$ openssl asn1parse -inform DER -in kpA_public.der
cons: SEQUENCE
cons: SEQUENCE
prim: OBJECT :id-ecPublicKey
cons: SEQUENCE
prim: INTEGER :01
cons: SEQUENCE
prim: OBJECT :prime-field
prim: INTEGER :FFFFFFFFFFFFFFFFFFFFFFFFFFFFFFFEFFFFAC73
cons: SEQUENCE
prim: OCTET STRING [HEX DUMP]:0000000000000000000000000000000000000000
prim: OCTET STRING [HEX DUMP]:0000000000000000000000000000000000000007
prim: OCTET STRING [HEX DUMP]:043B4C382CE37AA192A4019E763036F4F5DD4...
prim: INTEGER :0100000000000000000001B8FA16DFAB9ACA16B6B3
prim: INTEGER :01
prim: BIT STRING

We see that it contains the EC domain parameters (G is in uncompressed form) and the public key itself as a bit string. The private key file contains the public key plus the private key as an octet string (not shown).

Now that we have the two sets of keys, let's perform the actual key exchange. First we read the keys from storage, and use a KeyFactory to decode them (only Alice's part is shown):

SharedPreferences prefs = PreferenceManager
.getDefaultSharedPreferences(this);
String pubKeyStr = prefs.getString("kpA_public", null);
String privKeyStr = prefs.getString("kpB_private", null);

KeyFactory kf = KeyFactory.getInstance("ECDH", "SC");

X509EncodedKeySpec x509ks = new X509EncodedKeySpec(
Base64.decode(pubKeyStr));
PublicKey pubKeyA = kf.generatePublic(x509ks);

PKCS8EncodedKeySpec p8ks = new PKCS8EncodedKeySpec(
Base64.decode(privKeyStr));
PrivateKey privKeyA = kf.generatePrivate(p8ks);

After all that work, the actual key exchange is pretty easy (again, only Alice's part):

KeyAgreement aKA = KeyAgreement.getInstance("ECDH", "SC");
aKeyAgreement.init(privKeyA);
aKeyAgreement.doPhase(pubKeyB, true);

byte[] sharedKeyA = aKA.generateSecret();

Finally, the all important screenshot:


As you can see, Alice's and Bob's shared keys are the same, so we can conclude the key agreement is successful. Of course, for a practically useful cryptographic protocol that is only part of the story: they would need to generate a session key based on the shared secret and use it to encrypt communications. It's not too hard to come up with one, but inventing a secure protocol is not a trivial task, so the usual advice applies: use TLS or another standard protocol that already supports ECC.

To sum things up: you can easily implement ECDH using the standard JCE interfaces available in Android. However, older version (2.x) don't include the necessary ECC implementation classes in the default JCE provider (based on Bouncy Castle). To add support for ECC, you need to bundle a JCE provider that does and is usable on Android (i.e., doesn't depend on JDK classes not available in Android and doesn't clash with the default provider), such as Spongy Castle. Of course, another way is to use a lightweight API not based on JCE. For this particular scenario, Bouncy/Spongy Castle provides ECDHBasicAgreement.

That concludes our discussion of ECDH on Android. As usual, the full source code of the example app is available on Github for your hacking pleasure.

Using a Custom Certificate Trust Store on Android

$
0
0
As mentioned in a previous post, Android 4.0 (ICS) adds both a system UI and SDK API's that let you add certificates to the system trust store. On all previous version though, the system trust store is read-only and there is no way to add certificates on non-rooted devices. Therefore, if you want to connect to a server that is using a certificate not signed by one of the CA's included in the system trust store (including a self-signed one), you need to create and use a private trust store for the application. That is not particularly hard to do, but 'how to connect to a server with a self-signed certificate' is one of the most asked Android questions on StackOverflow, and the usual answer goes along the lines of 'simply trust all certificates and you are done'. While this will indeed let you connect, and might be OK for testing, it defeats the whole purpose of using HTTPS: your connection might be encrypted but you have no way of knowing who you are talking to. This opens the door to man-in-the-middle (MITM) attacks, and, needless to say, is bad practice. In this post we will explore how Android's HTTPS system works pre-ICS and show how to create and use a custom certificate trust store and a dynamically configurable TrustManager.

Some background: JSSE

Java, and by extension Android, implement SSL using a framework called Java Secure Socket Extension (JSSE). A discussion of how SSL and JSSE work is beyond the scope of this post, but you can find a shot introduction to SSL in the context of JSSE here. In brief, SSL provides both privacy and data integrity (i.e., an encrypted communications channel) and authentication of the parties involved. Authentication is implemented using public key cryptography and certificates. Each party presents their certificate, and if the other party trusts it, they negotiate a shared key to encrypt communications using the associated key pairs (public and private). JSSE delegates trust decisions to a TrustManager class, and authentication key selection to a KeyManager class. Each SSLSocket instance created via JSSE has access to those classes via the associated SSLContext (you can find a pretty picture here). Each TrustManager has a set of trusted CA certificates (trust anchors) and makes trust decisions based on those: if the target party's certificate is issued by one of the trusted CA's, it is considered trusted itself.

One way to specify the trust anchors is to add the CA certificates to a Java key store file, referred to as a 'trust store'. The default JSSE TrustManager is initialized using the system trust store which is generally a single key store file, saved to a system location and pre-populated with a set of major commercial and government CA certificates. If you want to change this, you need to create an appropriately configured TrustManager instance, either via a TrustManagerFactory, or by directly implementing the X509TrustManager interface. To make the general case where one just wants to use their own key store file to initialize the default TrustManager and/or KeyManager, JSSE provides a set of system properties to specify the files to use.

Android and javax.net.ssl.trustStore

If you want to specify your own system trust store file in desktop Java, it is just a matter of setting a value to the javax.net.ssl.trustStore system property when starting the program (usually using the -D JVM command line parameter). This property is also supported on Android, but things work a little differently. If you print the value of the property it will most likely be /system/etc/security/cacerts.bks, the system trust store file (pre-ICS; the property is not set on ICS). This value is used to intialize the default TrustManagerFactory, which in turn creates an X.509 certificate-based TrustManager. You can print the current trust anchors like this:

TrustManagerFactory tmf = TrustManagerFactory
.getInstance(TrustManagerFactory.getDefaultAlgorithm());
tmf.init((KeyStore) null);
X509TrustManager xtm = (X509TrustManager) tmf.getTrustManagers()[0];
for (X509Certificate cert : xtm.getAcceptedIssuers()) {
String certStr = "S:" + cert.getSubjectDN().getName() + "\nI:"
+ cert.getIssuerDN().getName();
Log.d(TAG, certStr);
}

If you now use System.setProperty() to point the property to your own trust store file, and run the above code again, you will see that it outputs the certificates in the specified file. Check the 'Set javax.net.ssl.trustStore' checkbox and use the 'Dump trusted certs' button of the sample app to try it.


If we can change the set of trusted certificates using this property, connecting to a server using a custom certificate should be easy, right? It turns out this is not the case. You can try it yourself using the sample app: pressing 'Default Connect' will result in a 'Trust anchor for certificate path not found' error regardless of the state of the 'Set javax.net.ssl.trustStore' checkbox. A little further investigation reveals that the default SSLContext is already initialized with the system trust anchors and setting the javax.net.ssl.trustStore property does not change this. Why? Because Android pre-loads system classes, and by the time your application starts, the default SSLContext is already initialized. Of course, any TrustManager's you create after setting the property will pick it up (see above).

Using your own trust store: HttpClient

Since we can't use the 'easy way' on Android, we need to specify the trust store to use programmatically. This is not hard either, but first we need to create a key store file with the certificates we need. The sample project contains a shell script that does this automatically. All you need is a recent Bouncy Castle jar file and the openssl command (usually available on Linux systems).  Drop the jar and a certificate (in PEM format) in the script's directory and run it like this:

$ ./importcert.sh cacert.pem

This will calculate the certificate subject's hash and use it as the alias in a Bouncy Castle key store file (BKS format) created in the application's raw/ resource directory. The script deletes the key store file if it already exists, but you can easily modify it to append certificates instead. If you are not the command-line type, you can use the Portecle GUI utility to create the key store file.

Apache's HttpClient provides a convenient SSLSocketFactory class that can be directly initialized with a trust store file (and a key store file if client authentication is needed). All you need to do is to register it in the scheme registry to handle the https scheme:

KeyStore localTrustStore = KeyStore.getInstance("BKS");
InputStream in = getResources().openRawResource(R.raw.mytruststore);
localTrustStore.load(in, TRUSTSTORE_PASSWORD.toCharArray());

SchemeRegistry schemeRegistry = new SchemeRegistry();
schemeRegistry.register(new Scheme("http", PlainSocketFactory
.getSocketFactory(), 80));
SSLSocketFactory sslSocketFactory = new SSLSocketFactory(trustStore);
schemeRegistry.register(new Scheme("https", sslSocketFactory, 443));
HttpParams params = new BasicHttpParams();
ClientConnectionManager cm =
new ThreadSafeClientConnManager(params, schemeRegistry);

HttpClient client = new DefaultHttpClient(cm, params);

Once initialized like this, the HttpClient instance will use our local trust store when verifying server certificates. If you need to use client authentication as well, just load and pass the key store containing the client's private key and certificate to the appropriate SSLSocketFactory constructor. See the sample project for details and use the 'HttpClient SSLSocketFactory Connect' button to test. Note that, when initialized like this, our HttpClient will use only the certificates in the specified file, completely ignoring the system trust store. Thus connections to say, https://google.com will fail. We will address this later.

Using your own trust store: HttpsURLConnection

Another popular HTTPS API on Android is HttpsURLConnection. Despite the not particularly flexible or expressive interface, apparently this is the preferred API from Android 2.3 (Gingerbread) and on. Whether to actually use is it is, of course, entirely up to you :) It uses JSSE to connect via HTTPS, so initializing it with our own trust and/or key store involves creating and initializing an SSLContext (HttpClient's SSLSocketFactory does this behind the scenes):

KeyStore trustStore = loadTrustStore();
KeyStore keyStore = loadKeyStore();

TrustManagerFactory tmf = TrustManagerFactory
.getInstance(TrustManagerFactory.getDefaultAlgorithm());
tmf.init(trustStore);

KeyManagerFactory kmf = KeyManagerFactory
.getInstance(KeyManagerFactory.getDefaultAlgorithm());
kmf.init(keyStore, KEYSTORE_PASSWORD.toCharArray());

SSLContext sslCtx = SSLContext.getInstance("TLS");
sslCtx.init(kmf.getKeyManagers(), tmf.getTrustManagers(), null);

URL url = new URL("https://myserver.com");
HttpsURLConnection urlConnection = (HttpsURLConnection) url
urlConnection.setSSLSocketFactory(sslCtx.getSocketFactory());

In this example we are using both a trust store and a key store, but if you don't need client authentication, you can just pass null as the first parameter of SSLContext.init().

Creating a dynamic TrustManager

As mentioned above, a TrustManager initialized with a custom trust store will only use the certificates in that store as trust anchors: the system defaults will be completely ignored. Sometimes this is all that is needed, but if you need to connect to both your own server and other public servers that use HTTPS (such as Twitter, for example), you will need to create two separate instances of HttpClient or HttpsURLConnection and switch between the two. Additionally, since the trust store is stored as an application resource, there is no way to add trusted certificates dynamically, you need to repackage the application to update the trust anchors. Certainly we can do better than that. The first problem is easily addressed by creating a custom TrustManager that delegates certificate checks to the system default one and uses the local trust store if verification fails. Here's how this looks like:

public class MyTrustManager implements X509TrustManager {

private X509TrustManager defaultTrustManager;
private X509TrustManager localTrustManager;

private X509Certificate[] acceptedIssuers;

public MyTrustManager(KeyStore localKeyStore) {
// init defaultTrustManager using the system defaults
// init localTrustManager using localKeyStore
}

public void checkServerTrusted(X509Certificate[] chain, String authType)
throws CertificateException {
try {
defaultTrustManager.checkServerTrusted(chain, authType);
} catch (CertificateException ce) {
localTrustManager.checkServerTrusted(chain, authType);
}
}

//...
}

To address the second problem, we simply copy the trust store to internal storage when we first start the application and use that file to initialize our TrustManager's. Since the file is owned by the application, you can easily add and remove trusted certificates. To test modifying the trust store works, copy a certificate file(s) in DER format to the SD card (external storage) root and use the sample application's 'Add certs' and 'Remove certs' menus to add or remove it to/from the local trust store file. You can then verify the contents of the file by using the 'Dump trusted certs' button (don't forget to check 'Set javax.net.ssl.trustStore'). To implement this the app simply uses the JCE KeyStore API to add or remove certificates and save the trust store file:

CertificateFactory cf = CertificateFactory.getInstance("X509");
InputStream is = new BufferedInputStream(new FileInputStream(certFile));
X509Certificate cert = (X509Certificate) cf.generateCertificate(is);
String alias = hashName(cert.getSubjectX500Principal());
localTrustStore.setCertificateEntry(alias, cert);

FileOutputStream out = new FileOutputStream(localTrustStoreFile);
localTrustStore.store(out, TRUSTSTORE_PASSWORD.toCharArray());

Using our MyTrustManager with HttpsURLConnection is not much different than using the default one:

MyTrustManager myTrustManager = new MyTrustManager(localTrustStore);
TrustManager[] tms = new TrustManager[] { myTrustManager };
SSLContext sslCtx = SSLContext.getInstance("TLS");
context.init(null, tms, null);

HttpsURLConnection urlConnection = (HttpsURLConnection) url
.openConnection();
urlConnection.setSSLSocketFactory(sslCtx.getSocketFactory());

HttpClient's SSLSocketFactory doesn't let us specify a custom TrustManager, so we need to create our own SocketFactory. To make initialization consistent with that of HttpsURLConnection, we have it take an already initialized SSLContext as a parameter and use it to get a factory that lets us create SSL sockets as needed:

public class MySSLSocketFactory implements LayeredSocketFactory {

private SSLSocketFactory socketFactory;
private X509HostnameVerifier hostnameVerifier;

public MySSLSocketFactory(SSLContext sslCtx,
X509HostnameVerifier hostnameVerifier) {
this.socketFactory = sslCtx.getSocketFactory();
this.hostnameVerifier = hostnameVerifier;
}

//..

@Override
public Socket createSocket() throws IOException {
return socketFactory.createSocket();
}
}

Initializing an HttpClient instance is now simply a matter of registering our socket factory for the https scheme:

SSLContext sslContext = createSslContext();
MySSLSocketFactory socketFactory = new MySSLSocketFactory(
sslContext, new BrowserCompatHostnameVerifier());
schemeRegistry.register(new Scheme("https", sslSocketFactory, 443));

You can check that this actually works with the 'HttpClient Connect' and 'HttpsURLConnection Connect' buttons of the sample application. Both clients are using our custom TrustManager outlined above and trust anchors are loaded dynamically: adding and removing certificates via the menu will directly influence whether you can connect to the target server.

Summary

We've shown how the default TrustManager on pre-ICS Android devices works and how to set up both HttpClient and HttpsURLConnection to use a local (application-scoped) trust and/or key store. In addition, the sample app provides a custom TrustManager implementation that both extends the system one, and supports dynamically adding and removing application-specified trust anchors. While this is not as flexible as the system-wide trust store introduced in ICS, it should be sufficient for most applications that need to manage their own SSL trust store. Do use those examples as a starting point and please do not use any of the trust-all 'solutions' that pop up on StackOverflow every other day.

Kanji Recognizer v2.1 Released

$
0
0
The newest version is now available on the Android Market. This release brings a slightly more polished UI, some convenient new features and support for upgrading using coupon codes.

The action bar pattern was introduced in version 2.0 for both tablets and phones, but action item icons depended on the OS version. This release bundles a set of common icons (created with the excellent Android Asset Studio), that should make the look and feel of the app consistent across different devices and Android versions. Here's how the main screen looks like with the new action bar icons:

Kanji Recognizer has supported copying and appending recognized characters to the clipboard for use in other apps since the very first version. However, sending character data to other apps using Android's native sharing functionality was missing. This version (finally) corrects that. You can now send characters (kanji, reading and meaning) to any app that accepts text data. One thing to note is that, while previous versions used the 'share' icon for copying, v2.1 uses it for sharing, and thus there is a new icon for copying (first from the left, see screenshot below). You can also copy a kanji by long-pressing on the title character.


The app lets you mark characters you search for, or ones coming up in the writing quiz as favorite (premium only). If you wanted to import favorited characters into other programs (for printing, editing or review), you could do so using the CSV export feature. It writes out character data to a portable format, but all post-processing is up to you. One of the most popular methods of reviewing words and characters is using flashcards, and without a doubt the best flashcard application for both desktop and mobile is Anki. While you could create Anki decks using the exported CSV with the help of the Anki desktop application, Kanji Recognizer can now export your favorites directly to an Anki deck. Just open favorites, tap the up arrow icon and select 'Anki deck' from the menu. The deck file will be saved to Kanji Recognizer's folder on the SD card, so you need to either point the Anki app to that folder, or copy it to your deck folder using a file manager.

Another often requested feature that made it to this release is audible correctness feedback for the quiz. Right/wrong answers are now marked by a bell/buzzer sound, as well as visually. The feature is off by default, enable it by opening Settings and checking the 'Use sounds' in the 'Quiz settings' section.

Finally, not really a core app feature, but important nonetheless: upgrading using coupon codes. You can now upgrade to the premium version using a coupon code, as well as via the Android Market. This makes it easy (for me:)) to promote the app by giving away upgrade codes, and enables users to get premium features on devices without the Android Market. I might also add an ability to buy coupon codes and send them as gifts, so stay tuned. And now, for all those that read this post till the end, here are some free upgrade codes. Get them while they last and don't forget to rate the app!

  • 9x1q930i
  • vg9ymfu5
  • x1pjtnpv
  • 4y0jopea
  • 3spe1dqk

Hanzi Recognizer v2.1

$
0
0
The latest version is now live on the Android Market. This release shares some basic features with Kanji Recognizer v2.1 and offers improved compounds search.

The app has a new set of action bar icons, consistent across Android versions. The main screen now looks like this:


Version 2.1 also adds support for native Android sharing and a new icon for copying, see the Kanji Recognizer post for details.

Another common feature, that we will present in a bit more detail here, is support for direct export to an Anki deck. Anki is a flashcard application that employs the spaced repetition learning technique which has been proven very effective for vocabulary acquisition. Besides managing your flashcards, Anki automatically decides when to present a particular flashcard based on feedback from the user, thus greatly optimizing the learning experience. Applications are provided for both desktop (Windows/Mac/Linux), mobile (Android/iPhone) and the Web.

Favorites export to an Anki deck is now integrated into the export menu. However, since your favorites can contain both characters and compounds, you need to use the filter to select one or the other, since mixed flashcards are not currently supported. Here's how:
  1. On the Favorites tab, tap the filter action bar icon and select 'Hanzi' or 'Compounds'.
  2. Tap the up arrow (export) icon and select 'Anki deck' from the menu.
  3. The deck file will be saved to the app's directory on the SD card
    (usually /mnt/sdcard/Android/data/org.nick.hanzirecognizer/files/export)
  4. Copy it to AnkiDriod's deck directory using your favorite file manager.

When you open AnkiDroid, your exported favorites will be displayed in the list of decks, and when you open it, you will get a deck summary screen that looks like this:


Press 'Start reviewing' and each character or compound will be presented for review. After you press 'Show answer', the answer, as well as four feedback buttons will be displayed. Tap a feedback button based on how hard you found it to recall the presented character (be honest!), to let Anki decide when to show it for review again. The screen should look something like this:


Another feature improved in 2.1 is direct search by character, Pinyin or English meaning (premium only). In all previous versions, direct search would only look in the character database, and therefore searches for, say,  'chou1 ti5' or 抽屜 would return an empty result list. The latest version now determines whether you are looking up a single character or a compound automatically and searches the correct database. Note that you need to include a space between Pinyin syllables, so the app can recognize your query as a compounds search. Searches by meaning (using an English word or expression) will look for compounds if a matching single character is not found. 

The final new feature is support for upgrading using coupon codes. You can now upgrade to the premium version using a coupon code, as well as via the Android Market. Just open Settings, tap 'Redeem license' and enter your email address and a valid coupon code. Here are some free upgrade coupons for those brave souls willing to test how it works:
  • g97cjjwq
  • u2116jw8
  • llordaxb

Gift Coupons for Kanji/Hanzi Recognizer

$
0
0
Ever wanted to give and Android app as a gift? Unfortunately, this is not supported by the Android Market, so unless you are willing to share your Google Wallet account, you currently can't do this for most apps. Kanji Recognizer and Hanzi Recognizer are however special: it is now possible to buy an upgrade coupon code and give it as a gift.

As of version 2.1, both apps support upgrading via coupon codes, as well as directly through the Android Market. If you just want to upgrade on your own device, the fastest way is to open Settings, and hit 'Upgrade to premium' (as before). After you authorize the payment using the Android Market dialog, all premium features will be enabled within seconds. To get a gift coupon code on the other hand, visit this page, select an app and login with your Google account. Then just enter your email address and press the 'Buy' button. Since payments are handled through Google Wallet, just as on Android, no registration or entering of payment details is required.  Simply review the purchase details on the Google Wallet dialog, and press 'Finish'. The coupon code and upgrade instructions will be sent to your email address immediately. You can then give the coupon code as a gift to anyone -- it is not tied to your account.

To upgrade using the coupon code, open the app's Settings and tap 'Redeem license' to display the license screen. Enter a valid email address and the coupon code, then tap 'Redeem license' to retrieve the license. The coupon code will be validated, and premium features will be enabled automatically upon success. Validation needs an Internet connection, so make sure you are not offline when redeeming a license.


The license will be associated with the entered email address, and a recovery PIN will be sent to it. If you wiped (a.k.a 'factory reset') your device or have a new one, you can recover the license using this PIN. Just select 'Recover license' in the license screen (see screenshot), and enter your email address, the coupon code and the PIN. Premium features will be enabled once the coupon code an PIN are verified.

Try it out, and send some gifts!

New Handwriting Recognizer Site

$
0
0
The previously announced gift coupon page for Kanji and Hanzi Recognizer has been renewed and expanded into a full-featured website. It now has dedicated pages for bothapps that introduce each app's features, detail requirements and, most importantly, explain how to get and install the app. Direct downloads are now provided, making it easy to install the apps on devices without the Android Market, and in countries where they are not available. Unfortunately, the Android Market treats free apps with the ability to upgrade via an in-app purchase as paid apps, and thus they are unavailable in countries that don't support Market purchases. There are still quite a few unsupported countries, including major app consumers such as Taiwan. The new site should make it easier for people in those countries to find and use the apps. And hopefully decipher some Chinese characters on the go :) Here's how the site looks:


If the design looks familiar, it's because it uses the excellent Bootstrap CSS library. The original coupon page used version 1.4, and was updated to the recently released Bootstrap 2. Other implementation details: it is currently running on Google App Engine, uses jQuery and is free of any Web application frameworks. The site makes use of Bootstrap's supports for responsive design, and while best viewed using a modern desktop browser, will automatically adapt to smaller screens as well.

After this short Web technology refresher, back to Android. Coming up next (probably...), a WWWJDIC update. Stay tuned!

WWWJDIC for Android 2.2

$
0
0
After a long break, a new version of WWWJDIC for Android is available on the Android MarketGoogle Play. The new release comes with a new UI and a fresh set of icons, support for more dictionaries and widget improvements. It also marks 2 years since the first public release (0.1).

Onceagain, WWWJDIC makes use of the excellent ActionBarSherlock library to make app features more accessible and easier to use. ActionBarSherlock 4.0, based on Ice Cream Sandwich (ICS) source code, backports all features of the action bar found in Android 4.0 to Android 2.x and 3.x devices. Of those, the one most prominently used in WWWJDIC is the split action bar. Android's action bar can host multiple action buttons to let users easily access app features, but on handset screens the number of buttons is limited to 2 or at most 3, in order to leave some space for the activity icon and title. Actions that don't fit in the action bar are by default moved into the overflow menu. Since they are hidden, it's harder for new users to find them, and some app features may go undiscovered for quite a while. The solution to this problem, introduced in ICS, is the split action bar. An app configured to use it will display actions in the top action bar when space is available (in landscape mode and/or on tablets), but show a secondary action bar at the bottom of the screen when running on a narrow-screen device. Since the app icon and title are displayed at the top, all space can be dedicated to action buttons (usually up to 5). Most WWWJDIC screens now make use of the split action bar, and some features originally accessible via inline buttons have been moved to the bottom bar. Here's how the main screen looks like now:


All major app features (handwriting recognition, OCR, multi-radical search and favorites/history) now have their own icon in the bottom bar (new icons created with Android Asset Studio). This  makes app features easier to discover for new users and provides a consistent look across the whole app. The main  action bar (with home icon and app title) has been removed to make sure all features are accessible without scrolling even on devices with small screens. You can switch between the dictionary, kanji and example search modes as before: by selecting the appropriate tab or swiping left or right.

Another major change in WWWJDIC 2.2 is how contextual actions are handled. Up till now, long-pressing on a list item would display a pop-up contextual menu with available options. In 2.2, contextual actions are displayed in the contextual action bar, similarly to regular action buttons. This lets us make it explicit on which item the action will be performed by highlighting it, without the pop-up menu getting in the way. Additionally, displaying the action buttons in a place users are accustomed to seeing them results in a more consistent user interface. As an example, here's how context actions for kanji are displayed. Icons for the available operations are displayed in the contextual action bar, and the check mark on the left lets us dismiss the contextual mode and clear the selection. As with the regular action bar, if you are not sure what an icons represents, long-pressing on it will show a small textual hint.


Native Android sharing has been added to all details screens, so you can now send the dictionary entry, kanji or example sentence you are viewing to any Android app that accepts plain text simply by pressing the share button. Copying to the clipboard is available as before, but has a new icon (the middle on in the screenshot below). Note that details screens are using the split action bar now, and some inline buttons have been moved there: the kanji stroke order button bellow, as well as the example search button, previously displayed on the dictionary details screen.


The stroke order diagram backend, running on Google App Engine, has been migrated to the High Replication Datastore. This should result in faster stroke order display time and less errors/downtime. Additionally, the backend is now a paid app with additional quota to let it handle traffic spikes and assure faster response time. Supporting the app is still relatively cheap, but not completely free, so buying the donate version is appreciated.

The kanji of the day widget also gets a few improvements in 2.2 (along with a pesky details layout bug, already fixed in 2.2.2). In addition to the previous random selection mode, there is now a sequential display mode as well. If you select it in the configuration screen, the kanji of the day will be displayed in a predictable order: either  JIS Level 1/2 order or as defined in the JLPT kanji lists for each level. The widget configuration screen has been added to Settings, so now you can change how the widget is displayed without having to remove and re-add it (only enabled if there is at least one widget on the home screen). Less visible, but important for people trying to squeeze the best performance out of their devices, is how network connectivity changes are handled. In previous versions, WWWJDIC would receive a network change notification (connected to WiFi, offline, etc.) and try to update the widget if the previous update failed due to lack of Internet access. The check would be performed even if you were not using the widget, causing a new WWWJDIC process to be created (if not already running) for each check. As of 2.2, the app only registers itself for network notifications if you have at least one widget installed. That should save a few CPU cycles for people not currently using the kanji of the day widget.

Last but not least, WWWJDIC (the site) introduced support for a Japanese-Italian dictionary in February. The Android app now supports Italian (text-to-speech also available) as well, and can access some of the less known WWWJDIC dictionaries: Japanese WordNet, Combined English-Japanese as well as the Work-in-progress dictionary.

Finally, a short statistical recap to mark the app's second birthday: 86 thousand total downloads, 40 thousand of which are active users. 70% of users are in Japan, followed by the US with 12%, then Germany, Australia, the United Kingdom and France with 1-2%. The most popular devices are Toshiba Regza, Samsung Galaxy S2 and the original Galaxy S. There is still some way to go until 100K downloads, so if you are not already using the app get it now and help it join the 100K club!

Using Password-based Encryption on Android

$
0
0

Why password-based encryption is needed


There are various reasons why one would want to encrypt data in an Android application: to make sure that files exported to shared storage (SD card, etc.) are not easily accessible to other apps; to encrypt sensitive information (such as authentication information for third-party services) stored by the app or to provide some sort of a DRM-like scheme where content is only accessible to users who own the appropriate key to access it. The Android SDK includes the Java Cryptography Extension (JCE) interfaces that provide easy access to common cryptographic operations, and all mainstream Android devices come with JCE providers that implement current symmetric encryption algorithms such as AES. Thus encrypting application data is fairly easily accomplished in Android by using standard APIs.

However, as in other systems, the harder part is not performing the actual cryptographic operations, but key management. If a key is stored along with the encrypted data, or even as a file private to the application, it is fairly easy to extract it, especially on a rooted device, and decrypt the data. The same is true for keys embedded in the application source code, even if they are somewhat obfuscated.There are generally two solutions to this problem: use a system service to protect the key, or don't store the key on the device at all, and have it entered each time access to protected data is needed. Android does provide a system key chain facility since version 4.0 (ICS), accessible via the KeyChain class. However, as discussed here, it can currently only be used to store RSA private keys and certificates. It is not generic enough to allow secure storage of arbitrary user data, including symmetric encryption keys. That leaves us with the other option: do not store encryption keys on the device. However, symmetric encryption keys are long random strings of bits, and it cannot be expected that someone would actually remember them, let alone enter them using an onscreen keyboard. On the other hand, users are quite familiar with passwords, and thus a way to generate strong cryptographic keys based on a humanly-manageable passwords is needed. There are standard and secure ways to do this, but let's first look at some non-standard, and generally not secure, but quite common ways of producing a key from a password. We will be using AES as the encryption algorithm for all examples, both because it is the current standard and is considered highly secure, and because it is practically the only symmetric algorithm guaranteed to be available on all Android versions. All key derivation methods presented here are implemented in the sample application (screenshot below, source is on github).


How not to generate a key from a password: padded password


Since a symmetric cipher's key has no structure and is just a string of bits with a predefined length, pretty much any string of sufficient length can be used to construct a key. For example, a 16 character password is easily converted to an 128 bit AES key by simply getting the raw bytes of the string in a particular encoding (such as UTF-8). While some implementations will reject known weak keys (such as ones composed only of zero bits), you will get a perfectly valid key, and will be able encrypt and decrypt with it. You might find 'helpful' sample code to achieve this on forums and the like that goes something like this:

int keyLength = 128; 
byte[] keyBytes = new byte[keyLength / 8];
// explicitly fill with zeros
Arrays.fill(keyBytes, (byte) 0x0);

// if password is shorter then key length, it will be zero-padded
// to key length
byte[] passwordBytes = password.getBytes("UTF-8");
int length = passwordeBytes.length < keyBytes.length ? passwordBytes.length
: keyBytes.length;
System.arraycopy(passwordBytes, 0, keyBytes, 0, length);
SecretKey key = new SecretKeySpec(keyBytes, "AES");

Since most people wouldn't pick a 16 character password (let alone a 32 character one for a 256 bit key), the key 'derivation' code makes due with what is available: if the password doesn't have enough characters for a full key, it pads it with zeros bytes (or some other fixed value) to create a valid key. Here's whey this (or variations of it) code generates weak keys:
  • it limits the range of bytes used for the key to those encoding printable characters, thus effectively reducing the key size (out of 256 possible values for a byte, only 95 are printable ASCII characters). While there are 2^128 possible 128 bit AES keys, if only printable characters are used to construct the key, there are about 2^105 possible keys (equivalent to using a 105 bit AES key if such a key were possible).
  • if the password is shorter than the key size, the fixed padding further reduces the key space. For example, if the user picks up an 8-character password, that would result in roughly 2^52 possible keys. That is less even than DES's 56 bit key which has been considered weak for ages and can be brute-forced in less than a day using commercial hardware.
  • since the password is used as is to construct the key, the cost of generating a key 'derived' using this method is practically zero. Thus an attacker can easily generate a bunch of keys based on a list of common passwords and use them for a brute force attack. Since the number of keys (=common passwords) is limited, such an attack is very efficient, and if a poor password has been chosen, more often than not it will succeed.
You might think that no one would use such a naive key derivation scheme, but as it turns out, even fairly popular key manager apps are known to have used it. 

To sum this up: a symmetric encryption key needs to be random to provide sufficient security, and user-entered passwords are a poor source of randomness. Don't use them as is to construct a key.

How not to generate a key from a password: SHA1PRNG

Since, as mentioned above, a key needs to be random, it stands to reason to use a random number generator (RNG) to generate one. There are two flavours of those: "true" random generators that base their output on physical phenomena that are regarded as random (e.g., radioactive decay), and pseudo-random generators (PRNG) whose output is determined by a fairly short initialization value, know as a seed. By using a "truly random" (or close) value as the seed, PRNG's can produce sufficiently random output. To generate a random symmetric key based on a password we can use the password (in some form) to seed a PRNG, and thus produce predictable keys. There are standard key derivation algorithms based on this idea, which we will introduce later, but let's first look at some fairly common derivation code that implements this idea quite literally. You might come across code similar to this on 'code snippet' sites or even StackOverflow:

KeyGenerator kgen = KeyGenerator.getInstance("AES");
SecureRandom sr = SecureRandom.getInstance("SHA1PRNG");
byte[] seed = password.getBytes("UTF-8");
sr.setSeed(seed);
kgen.init(KEY_LENGTH, sr);
SecretKey key = kgen.generateKey();

This creates a random generator instance (SecureRandom) using the SHA1PRNG PRNG algorithm (which is currently the only RNG algorithm available on commercial Android devices), and seeds it with the password bytes. A KeyGenerator is then initialized with the SecureRandom instance, making sure that our password-seeded PRNG will be used when generating keys. Lastly, since a KeyGenerator for a symmetric algorithm simply requests a number of bits equal to the key size from the underlying (or system) RNG, we get a pseudorandom secret key based on the used password.

This scheme is not as bad as the previous one, since it produces a pseudorandom key, and doesn't reduce key size, but it is still not a good idea to use it. The first reason is the same as the last one for the padding method: generating a key is cheap and thus keys based on a password list can be readily generated, facilitating a brute force attack. How cheap: essentially the cost of a SHA-1 hash round, which is generally implemented in native code and is pretty fast. The second reason is that it is neither standard, nor portable. Even the JavaDoc entry for Android's SecureRandom says so: 'Not guaranteed to be compatible with the SHA1PRNG algorithm on the reference implementation.' The code above when run on Android and on a desktop system using Java SE produces the following 128 bit keys from the password string 'password'. Note that those may differ even between different Android platform or Java SE versions:

Android: 80A4495EF27725345AB3AFA08CE3A692
Java SE: 2470C0C06DEE42FD1618BB99005ADCA2

In short: while this method is slightly better than the previous one, it doesn't effectively prevent from brute force attacks and is not portable. Don't use it.

Proper key derivation: PKCS#5 and PKCS#12


A standard way to derive a symmetric encryption key from a password is defined in PKCS#5 (Public Key Cryptography Standard) published by RSA (the company). It was originally developed for generating DES keys, but the current versions (2.0 and draft of 2.1) extend it to be algorithm independent. Version 2.0 is also published as RFC 2898

The standard is based on two main ideas: using a salt to protect from table-assisted (pre-computed) dictionary attacks (salting) and using a large iteration count to make the key derivation computationally expensive (key stretching). As mentioned above, if a key is directly constructed from a password, it is easy to use pre-generated keys based on a list of common passwords for a brute force attack. By using a random 'salt' (so called because it is used to 'season' the password), multiple keys can be constructed based on the same password, and thus an attacker needs to generate a new key table for each salt value, making pre-computed table attacks much harder. A key point to note is that, while the salt is used along with the password to derive the key, unlike the password, it does not need to be kept secret. Its purpose is only to make a dictionary attack more difficult and it is often stored along with the encrypted data. The other approach applied in PKCS#5 is repeating the key derivation operation multiple times to produce the final key. This has little effect on legitimate use, where only one try is needed to derive the key from the correct password, but considerably slows down brute force attacks which try out multiple passwords in a row. 

PKCS#5 defines two key derivation functions, aptly named PBKDF1 and PBKDF2. PBKDF1 applies a hash function (MD5 or SHA-1) multiple times to the salt and password, feeding the output of each round to next one to produce the final output. The length of the final key is thus bound by the hash function output length (16 bytes for MD5, 20 bytes for SHA-1). PBKDF1 was originally designed for DES and its 16 or 20 byte output was enough to derive both a key (56 bits) and an initialization vector (64 bits) to encrypt in CBC mode. However, since this is not enough for algorithms with longer keys such as 3DES and AES, PBKDF1 shouldn't be used and is only left in the standard for backward compatibility reasons.
PBKDF2 doesn't suffer from the limitations of PBKDF1: it can produce keys of arbitrary length by generating as many blocks as needed to construct the key. To generate each block, a pseudorandom function is repeatedly applied to to the concatenation of the password, salt and block index. The pseudorandom function is configurable, but in practice HMAC-SHA1/256/384/512 are used, with HMAC-SHA1 being the most common. The password is used as the HMAC key and the salt takes the role of the message. Unlike PBKDF1, PBKDF2 doesn't specify how to derive an IV, so a randomly generated one is used.

Android's main JCE provider (Bouncy Castle) currently only supports PBKDF2WithHmacSHA1. Let's see how to use it to encrypt data with a 256 bit AES key derived from a password:

String password  = "password";
int iterationCount = 1000;
int saltLength = 8; // bytes; 64 bits
int keyLength = 256;

SecureRandom random = new SecureRandom();
byte[] salt = new byte[saltLength];
randomb.nextBytes(salt);
KeySpec keySpec = new PBEKeySpec(password.toCharArray(), salt,
iterationCount, keyLength);
SecretKeyFactory keyFactory = SecretKeyFactory
.getInstance("PBKDF2WithHmacSHA1");
byte[] keyBytes = keyFactory.generateSecret(keySpec).getEncoded();
SecretKey key = new SecretKeySpec(keyBytes, "AES");

Cipher cipher = Cipher.getInstance("AES/CBC/PKCS5Padding");
byte[] iv = new byte[cipher.getBlockSize());
random.nextBytes(iv);
IvParameterSpec ivParams = new IvParameterSpec(iv);
cipher.init(Cipher.ENCRYPT_MODE, key, ivParams);
byte[] ciphertext = cipher.doFinal(plaintext.getBytes("UTF-8"));

Here we generate a random salt and use 1000 iterations to initialize the SecretKeyFactory which generates our key. The last step of key generation might be a little confusing though: we don't use the SecretKey produced by the factory as is, but use its encoded value to create a new SecretKeySpec object. That is done because the output of generateSecret() is actually a PBEKey instance which does not contain an initialized IV -- the Cipher object expects that from a PBEKey and will throw an exception if it is not present. The iteration count and salt length are as recommended by PKCS#5, but that standard was written a while ago, so you might want to increase them. For some perspective, AES 256 bit keys used to encrypt backups in Android 4.0 (ICS) are derived using 10,000 iterations and a 512 bit salt; iOS 4.0 also uses 10,000 iterations. Next we generate a random IV, initialize the cipher and output the cipher text.

To be able to decrypt the cipher text we need: the password, the iteration count, the salt and the IV. The password will be input by the user, and the iteration count is generally fixed (if you decide to make it variable, you need to store it along with the other parameters), so that leaves the salt and the IV. As discussed above, the salt is not a secret, and neither is the IV. Thus they can be saved along with the cipher text. If they are stored in a single blob/file, some sort of structure is needed to be able the parse it into its components. The sample app 'saves' the encrypted message to a Base64-encoded string and simply concatenates the salt, IV and cipher text delimited by "]" (any character not used Base64 will do). Decryption is very similar to the code above, except that the salt and IV are not generated randomly, but retrieved from the encrypted message.

String[] fields = ciphertext.split("]");
byte[] salt = fromBase64(fields[0]);
byte[] iv = fromBase64(fields[1]);
byte[] cipherBytes = fromBase64(fields[2]);
// as above
SecretKey key = deriveKeyPbkdf2(salt, password);

Cipher cipher = Cipher.getInstance("AES/CBC/PKCS5Padding");
IvParameterSpec ivParams = new IvParameterSpec(iv);
cipher.init(Cipher.DECRYPT_MODE, key, ivParams);
byte[] plaintext = cipher.doFinal(cipherBytes);
String plainrStr = new String(plaintext , "UTF-8");

Another standard key derivation mechanism is the one defined in PKCS#12. It doesn't appear to have a catchy name like the previous two, and is generally only used for backward compatibility with Microsoft's original PFX format. Like PBKDF2, it can also generate keys and IV's with arbitrary length. The Bouncy Castle provider supports a bunch of variations compatible with AES such as PBEWITHSHA256AND256BITAES-CBC-BC. The IV is generated based on the password and salt, so you don't have to generate and store it separately. The sample app includes a PKCS#12 key derivation mode, refer to the source code if you want to check how the implementation differs from the code above.

Derivation speed

We've mentioned that the first two 'derivation' methods are very fast and thus provide no real protection against table assisted brute force attacks. PKCS#5 and PKCS#12 compliant derivation methods deliberately make the process slower to impede brute force attacks. But what exactly is the speed difference? The following table summarizes the average computation times for the four presented derivation methods. Measurements were performed on a Nexus One (1GHz CPU) using 1000 iterations and a 8 byte salt for both PKCS#5 and PKCS#12.  As you can see, even a relatively small number of iterations matters: iteration based methods are at least an order of magnitude slower, which in this case is a good thing since it makes brute force attacks harder.

Password derivation speed on Nexus One
PaddingSHA1PRNGPKCS#12PBKDF2
< 1 [ms]32 [ms]160 [ms]370 [ms]

Of course, the actual password matters a lot. If it is easily guessable, an attacker can easily find the encryption key, no matter how many iterations you used in your implementation. Thus regular password selection policies apply for password-based encryption (PBE) as well: do not use common dictionary words, mix lower and upper case letters with numbers and symbols. If possible, generate passwords automatically, and do not entrust users with password selection.

Conclusion

Using symmetric encryption on Android is quite straightforward, but since a general purpose, system-level secure storage is not available, key management could be complicated. One solution is not to store keys, but derive them from user-entered passwords. Password strings cannot be used as symmetric encryption keys as is, so some sort of key derivation is required. There are a few ways to derive keys, but most of them are not particularly secure. To ensure encryption keys are both sufficiently random and hard to brute force, you should use standard PBE key derivation methods. Of those, the one currently regarded secure and available on Android is PBKDF2WithHmacSHA1. In short: when deriving a key from a password use PBKDF2WithHmacSHA1, a sufficiently long randomly generated salt and an iteration count suitable for your app.

Kanji Recognizer v2.2 Released

$
0
0
After a long break, a new Kanji Recognizer version is now available on Google Play. This release introduces a new quiz training mode and adds some further UI improvements, courtesy of ActionBarSherlock.

One of the most popular features of the app is the kanji writing quiz. In the standard quiz mode, you are presented with the kanji's reading and English meaning (optional) and based on this information you have to recall the corresponding kanji and write it correctly. The quiz evaluates your input and keeps track of which characters you miswrote.This is a helpful tool for testing characters you already know, but it is only effective if you are fairly confident in your knowledge for the  particular level. If you can't remember a kanji, you need to skip it and can see the proper stroke order only after the quiz is over. To help you practice characters you haven't yet mastered, the new version introduces a training mode. If you select the training mode option in the quiz configuration screen, you will be presented with stroke guide lines and order hints to make it easier to practice new kanji. In training mode you need to write the character correctly in order to advance to the next one: if you make a mistake, you have to write the same kanji again until you get it right.This should be fairly straightforward to do if you follow the stroke guide lines, and you can compare your writing with the correct one on the quiz result screen, as before. Here's how it looks like in action:


One thing to note is that the stroke order information used to display the guide lines is fetched online in the free version, so you need an Internet connection to use the training mode. If you have the premium version, you can download the stroke order database and training mode will work even when offline.

An important UI change in version 2.2 is how contextual actions are implemented. In all previous versions long-pressing on a list item would display a pop-up contextual menu with available options. In the new version, contextual actions are displayed in the action bar, similarly to regular action buttons (contextual action bar). The selected item is highlighted and you can now clearly see on what object the action will be performed without the menu getting in the way. If you are not sure what an icon represents, long-pressing on it will show a brief hint.The contextual action bar is now the preferred Android UI selection pattern and is implemented across all Kanji Recognizer features. See how this looks like when you select an item form the list of favourites:


Version 2.1 introduced standard Android sharing that lets you easily send the current kanji's reading and definition to other apps. The new release improves on that feature by integrating a share action provider. This both takes less space on your screen by displaying the list of target applications inline, and speeds up sharing by showing the most recently used app directly in the action bar. Additionally, apps you share to more often are automatically moved up the list, so you don't have to scroll to find your favourite app. Here's how the new share UI looks on the kanji details screen:


The new version also fixes some minor bugs, and has a number of performance and stability improvements, mostly related to displaying stroke order and handling upgrades. This should hopefully make it easier to get an updated version into the Amazon Appstore, which is long overdue.

Finally, the app is now nearing the 250,000 download mark on Google Play, so do tell your friends about it and help it get to next level. Don't forget to rate, and please report any problems directly (the support email address is available in the app description and on the About screen), this will help get them fixed promptly.

Storing application secrets in Android's credential storage

$
0
0
This article describes how to talk to the system keystore daemon directly and store app-specific secrets in the system credential storage. It will introduce private API's, not available via the Android SDK and some OS services implementation details. Those may change at any time, and are not guaranteed to work. While the techniques described have been tested on a few different devices and OS versions (2.1 to 4.0), there are no guarantees. Use caution if you decide to implement them in a production app.

As described in previousarticles, Android has had a system-level credential storage since Donut (1.6). Up until ICS (4.0), it was only used by the VPN and WiFi connection services to store private keys and certificates, and a public API was not available. ICS introduced a public API  and integrated the credential storage with the rest of the OS. However, while the underlying implementation is able to store arbitrary data owned by any app, the ICS API only allows us to store private keys and certificates owned and managed by the OS. While this is could be seen as  a good thing -- it allows for tighter control over who can access what keys, it is also rather limiting. Third party apps often need to store sensitive information, such as passwords, authentication tokens and encryption keys the app uses, but the KeyChain API doesn't allow this. As mentioned in the password-based encryption article, one alternative is to derive a key from a user-supplied password and use it to encrypt sensitive data private to an application. While this works, it requires the user to remember one more password, and increases application complexity -- developers need to implement services, not directly related to app functionality; services that should ideally be provided by the system. The next Android version, reportedly just around the corner, might expose such services via public API's, but you could use them now, if you are willing to take the risk of your app breaking when Jelly Bean comes along.

Android's credential storage is implemented as a native Linux service (daemon), with a few extra layers on top of it that make it available to the framework. Let's quickly review what we know about the keystore daemon (described in more detail here):
  • it's a native daemon, started at boot
  • it provides a local control socket to allow apps and system services to talk to it
  • it encrypts keys using an AES 128 bit master key
  • encrypted keys are stored in /data/misc/keystore, one file per key
  • the master key is derived from the device unlock password or PIN
  • it authorizes administration commands execution and key access based on caller UID
Here's a quick summary of the available commands and who is permitted to execute them:

Keystore daemon commands
CommandDescriptionAllowed UIDsParameters
testCheck that the key store is in a usable stateanyone but root, vpn and wifinone
getGet unencrypted keyanyone (*1)key name
insertAdd or overwrite keyanyone but root, vpn and wifikey name and value
delDelete a keyanyone but root, vpn and wifi (*1)key name
existCheck if a key existsanyone but root, vpn and wifi (*1)key name
sawList keys with the specified prefixanyone but root, vpn and wifi (*1)key prefix
resetReset the key storesystemnone
passwordChange the key store passwordsystemnew password
lockLock the key storesystemnone
unlockUnlock the key storesystemnone
zeroCheck if the key store is emptysystemnone
*1 Only keys created with the same UID are visible/accessible

As you can see from the table above, once the credential storage is initialized and unlocked, any app can add, delete, list and get keys. Each key is bound to the UID of the process that created it, so that apps cannot access each other's keys or the system ones. Additionally, even system apps cannot see app keys, and root is explicitly prohibited from creating or listing keys. Thus, if the API were public user apps could use the credential storage to securely store their secrets, as long as it is unlocked. Unlocking, however, requires a system permission. On ICS, the credential storage is unlocked when you enter your device unlock pattern, PIN or password, so in practice the keystore daemon will be already in an unlocked state by the time your app starts. On pre-ICS devices the device unlock password and the credential storage protection password are separate, so unlocking the device has no effect on credential storage state. Fortunately, Android provides a system activity that can unlock the key store. All we have to do is send an intent with the proper action to start the unlock activity. The action is however, slightly different on pre-Honeycomb and Honeycomb/ICS devices, so we need to check the Android version, before sending it:

try {
if (Build.VERSION.SDK_INT < Build.VERSION_CODES.HONEYCOMB) {
startActivity(new Intent("android.credentials.UNLOCK"));
} else {
startActivity(new Intent("com.android.credentials.UNLOCK"));
}
} catch (ActivityNotFoundException e) {
Log.e(TAG, "No UNLOCK activity: " + e.getMessage(), e);
}

Note that the unlock activity is using the transparent theme, so it will look like a dialog originating from your own activity. It is, however, managed by the system, so your app will be paused and resumed only after the unlock activity finishes. You need to handle this in your activity's code (you can't use startActivityForResult() though, since the unlock activity doesn't call setResult()). Additionally, if you don't have a device (or credential storage on pre-ICS devices) password set up, you will be prompted to set one. Control will be returned to your app only after you have set and confirmed an unlock password and initialized the credential storage.

Now that the keystore is unlocked, we can try to actually use it. As briefly mentioned above, it uses a local control socket for IPC, and the protocol is rather simple: a single letter command, followed by the length and value of any parameters (up to two). The protocol is already implemented in the android.security.KeyStore class, which is however hidden from non-system  applications. The reason for not exposing this API given in the JavaDoc comment is that 'it assumes that private and secret key bytes are available and would preclude the use of hardware crypto'. This is a very valid comment: in the current implementation keys are exported and imported as unencrypted blobs. If the keys were protected by a hardware device, the API would have to return some sort of an opaque key handle, since the actual key material would not be available, or would only be exportable if wrapped with another key. If the next Android version introduces hardware cryptography support, the API would have to change dramatically. Having said that, we want to use the keystore now, so we will ignore the warning and go ahead. Since the KeyStore is hidden we cannot import it directly, but we can call it using reflection. This is easy enough to do, but somewhat cumbersome. As the class doesn't really have any dependencies it is easier to copy it in our project, adding a few minor modifications to get it to compile (see sample code). Once this is done, we can list, add and get keys:

KeyStore ks = KeyStore.getInstance();
// get the names of all keys created by our app
String[] keyNames = ks.saw("");

// store a symmetric key in the keystore
SecretKey key = Crypto.generateKey();
boolean success = ks.put("secretKey1", key.getEncoded());
// check if operation succeeded and get error code if not
if (!success) {
int errorCode = ks.getLastError();
throw new RuntimeException("Keystore error: " + errorCode);
}

// get a key from the keystore
byte[] keyBytes = ks.get("secretKey1");
SecretKey key = new SecretKeySpec(keyBytes, "AES");

// delete a key
boolean success = ks.delete("secretKey1");

As you can see from the code above, using the credential storage is pretty straightforward. You save keys by giving them a name (used as part of the file name the encrypted blobs are saved into), and then use that name to retrieve or delete them. The UID of the process that created the key is also a part of the file name, and thus key names only need to be unique within your application. One thing to note is that KeyStore methods that don't return a value (key name(s) or bytes), return a success flag, so you need to make sure you check it. In case of an error a more detailed error code can be obtained by calling getLastError(). All error codes are defined in the KeyStore class, but you are most likely to encounter PERMISSION_DENIED (if you try to call one of the methods reserved for the system user) or KEY_NOT_FOUND (if you try to access a non-existing key).

Check the sample project for a full app that generates an AES key, encrypts some data, then stores the key in the system credential storage and later retrieves it in order to decrypt the data. It generates and saves a new key each time you press 'Encrypt' and you can see the stored keys in the list view. Press the 'Reset' button to delete all keys created by the app. Note that the KeyStore class used is not compatible with the original Donut (Android 1.6) credential storage implementation, but it should work with all (public) subsequent versions. Here's how the app's screen looks like. Full code is, as usual, on github.


Besides keys you can store any sensitive information your app needs such as login passwords or tokens. Since decrypting the files on disk requires a key derived from the unlock password (or a dedicated password on pre-ICS devices), your secrets cannot be extracted even by apps with root access, or someone with physical access to the device (unless they know the password, of course). The master encryption key, however, is not tied to the device (like in iOS), so it is possible to copy the encrypted key files and perform a brute force attack on a different, more powerful machine(s).

You can experiment with other KeyStore API's, but most of those will result in a PERMISSION_DENIED when called from a non-system app. On ICS, there is also a public intent (action: com.android.credentials.RESET) that resets the credential storage, so you could prompt the user to clear it from your app, if necessary. Note that this will delete all stored data (keys, certificates, etc.), not just the ones your app created, so use with caution.

As a final warning, the code presented in this post does rely on private API's and OS implementation details, so it might break with the next Android version, or even not work on all current devices. Keep this in mind if you decide to use it in a production app.

Unpacking Android backups

$
0
0
One of the less known new features introduced in ICS is the ability to backup a device to a file on your computer via USB. All you have to do is enable USB debugging, connect your phone to a computer and type the adb backup command in a shell. That will show a confirmation dialog on the phone prompting you to authorize the backup and optionally specify a backup encryption password. It looks something like this:


This doesn't require rooting your phone and lets you backup application data, both user installed and system applications (APK's), as well as shared storage (SD card) contents. There are some limitations though: it won't backup apps that have explicitly forbidden backups in their manifest, it won't backup protected (with DRM) apps and it won't backup some system settings such as APN's and WiFi access points. The transfer speed is limited by ADB channel speed (less than 1MB/s), so full backups can take quite some time. There is also a rather annoying bug in 4.0.4 where it will backup shared storage even if you don't request it. With all that said, it's a very useful tool, and will hopefully see some improvements in the next Android version.

The backup command is fairly flexible and lets you specify what apps to backup, whether to include system apps when doing a full backup, and whether to include shared storage (SD card) files. Here's a summary of the available options as displayed by adb's usage:

adb backup [-f ] [-apk|-noapk] [-shared|-noshared] [-all] [-system|-nosystem] [<packages...>]

- write an archive of the device's data to <file>. If no -f option is supplied then the data
is written to "backup.ab" in the current directory.

(-apk|-noapk enable/disable backup of the .apks themselves in the archive;
the default is noapk.)
(-shared|-noshared enable/disable backup of the device's shared storage / SD card contents;
the default is noshared.)
(-all means to back up all installed applications)
(-system|-nosystem toggles whether -all automatically includes system applications;
the default is to include system apps)
(<packages...> is the list of applications to be backed up. If the -all or -shared flags
are passed, then the package list is optional. Applications explicitly given on the command
line will be included even if -nosystem would ordinarily cause them to be omitted.)

The restore command is however quite limited -- there are no options, you can only specify the path to the backup file. One of the features most noticeably lacking is conditional restore: restores are all or nothing, you cannot restore only a subset of the apps (packages), or restore only the contents of the shared storage. Supporting this will require modifying the firmware, but you can extract only the needed data from the backup and copy it manually. Copying apps and app data to your device requires root access, but extracting and copying external storage files such as pictures and music can be done on any stock ICS device. And if you create a backup file containing only the files you need to restore, you wouldn't need root access at all. This post will present the format of Android's backup files and introduce a small tool that allows you to extract and repackage them as needed.

SDK API's for using Android's backup architecture were announced as far back as Froyo (2.2), but it has probably been available internally even before that. As introduced in Froyo, it uses a proprietary Google transport to backup application settings to the "cloud". ICS adds a local transport that lets you save backups to a file on your computer as well. The actual backup is performed on the device, and is streamed to your computer using the same protocol that adb pull uses to let you save a device file locally. When you execute the adb backup command a new Java process (not an activity or service) will be started on your device and it will bind to the system's BackupManagerService and requests a backup with the parameters you specified. BackupManagerService will in turn start the confirmation activity shown above, and execute the actual backup if you confirm (some more details including code referenceshere). You have the option of specifying an encryption password, and if your device is already encrypted you are required to enter the device encryption password to proceed. It will be used to encrypt the archive as well (you can't specify a separate backup encryption password).

After all this is done, you should have a backup file on your computer. Let's peek inside it. If you open it with your favourite editor, you will see that it starts with a few lines of text, followed by binary data. The text lines specify the backup format and encryption parameters, if you specified a password when creating it. For an unencrypted backup it looks like this:

ANDROID BACKUP
1
1
none

The first line is the file 'magic', the second the format version (currently 1), the third is a compression flag, and the last one the encryption algorithm ('none' or 'AES-256').

The actual backup data is a compressed and optionally encrypted tar file that includes a backup manifest file, followed by the application APK, if any, and app data (files, databases and shared preferences). The data is compressed using the deflate algorithm, so, in theory, you should be able to decompress an unencrypted archive with standard archive utilities, but I haven't been able to fine one compatible with Java's Deflater (Update: here's how to convert to tar using OpenSSL's zlib command: dd if=mybackup.ab bs=1 skip=24|openssl zlib -d > mybackup.tar). After the backup is uncompresed you can extract it by simply using tar xvf mybackup.tar. That will produce output similar to the following:

$ tar tvf mybackup.tar
-rw------- 1000/1000 1019 2012-06-04 16:44 apps/org.myapp/_manifest
-rw-r--r-- 1000/1000 1412208 2012-06-02 23:53 apps/org.myapp/a/org.myapp-1.apk
-rw-rw---- 10091/10091 231 2012-06-02 23:41 apps/org.myapp/f/share_history.xml
-rw-rw---- 10091/10091 0 2012-06-02 23:41 apps/org.myapp/db/myapp.db-journal
-rw-rw---- 10091/10091 5120 2012-06-02 23:41 apps/org.myapp/db/myapp.db
-rw-rw---- 10091/10091 1110 2012-06-03 01:29 apps/org.myapp/sp/org.myapp_preferences.xml

App data is stored under the app/ directory, starting with a _manifest file, the APK (if requested) in a/, app files in f/, databases in db/ and shared preferences in sp/. The manifest contains the app's version code, the platform's version code, a flag indicating whether the archive contains the app APK and finally the app's signing certificate (called 'signature' in Android API's). The BackupManagerService uses this info when restoring an app, mostly to check whether it has been signed with the same certificate as the currently installed one. If the certificates don't match it will skip installing the APK, except for system packages which might be signed with a different (manufacturer owned) certificate on different devices. Additionally, it expects the files to be in the order shown above and restore will fail if they are out for order. For example, if the manifests states that the backup includes an APK, it will try to read and install the APK first, before restoring the app's files. This makes perfect sense -- you cannot restore files for an app you don't have installed. However BackupManagerService will not search for the APK in the archive, and if it is not right after the manifest, all other files will be skipped. Unfortunately there is no indication about this in the device GUI, it is only shown as logcat warnings. If you requested external storage backup (using the -shared option), there will also be a shared/ directory in the archive as well, containing external storage files for each shared volume (usually only shared/0/ for the first/default shared volume).

If you specified an encryption password, things get a little more interesting. It will be used to generate an AES-256 key using 10000 rounds of PBKDF2 with a randomly generated 512 bit salt. This key will be then used to encrypt a randomly generated AES-256 bit master key, that is in turn used to encrypt the actual archive data in CBC mode ("AES/CBC/PKCS5Padding" in JCE speak). A master key checksum is also calculated and saved in the backup file header. All this is fairly standard practice, but the way the checksum is calculated -- not so much. The generated raw master key is converted to a Java character array by casting each byte to char, the result is treated as a password string, and run through the PBKDF2 function to effectively generate another AES key, which is used as the checksum. Needless to say, an AES key would most probably contain quite a few bytes not mappable to printable characters, and since PKCS#5 does not specify the actual encoding of a password string, this produces implementation dependent results (more on this later). The checksum is used to verify whether the user-specified decryption password is correct before actually going ahead and decrypting the backup data: after the master key is decrypted, its checksum is calculated using the method described and compared to the checksum in the archive header. If they don't match, the specified password is considered incorrect and the restore process is aborted. Here's the header format for an encrypted archive:

ANDROID BACKUP
1
1
AES-256
B9CE04167F... [user password salt in hex]
9C44216888... [master key checksum salt in hex]
10000 [number of PBKDF2 rounds]
990CB8BC5A... [user key IV in hex]
2E20FCD0BB... [master key blob in hex]

The master key blob contains the archive data encryption IV, the actual master key and its checksum, all encrypted with the key derived from the user-supplied password. The detailed format is below:

[byte] IV length = Niv
[array of Niv bytes] IV itself
[byte] master key length = Nmk
[array of Nmk bytes] master key itself
[byte] MK checksum hash length = Nck
[array of Nck bytes] master key checksum hash

Based on all this info, it should be fairly easy to write a simple utility that decrypts and decompresses Android backups, right? Porting relevant code from BackupManagerService is indeed fairly straightforward. One thing to note is that it uses SYNC_FLUSH mode for the Defalter which is only available on Java 7. Another requirement is to have the JCE unlimited strength jurisdiction policy files installed, otherwise you won't be able to use 256 bit AES keys. Running the ported code against an unencrypted archive works as expected, however trying do decrypt an archive consistently fails when checking the master key checksum. Looking into this further reveals that Android's PBKDF2 implementation, based on Bouncy Castle code, treats passwords as ASCII when converting them to a byte array. The PKCS#5 standard states that 'a password is considered to be an octet string of arbitrary length whose interpretation as a text string is unspecified', so this is not technically incorrect. However since the 'password' used when calculating the master key checksum is a randomly generated value (the AES key), it will obviously contain bytes not mappable to ASCII characters. Java SE (Oracle/Sun) seems to treat those differently (most probably as UTF-8), and thus produces a different checksum. There are two ways around this: either use a Bouncy Castle library with the Android patches applied, or implement an Android-compatible PBKDF2 function in our decryption code. Since the Android Bouncy Castle patch is quite big (more than 10,000 lines in ICS), the second option is clearly preferable. Here's how to implement it using the Bouncy Castle lower level API's:

SecretKey androidPBKDF2(char[] pwArray, byte[] salt, int rounds) {
PBEParametersGenerator generator = new PKCS5S2ParametersGenerator();
generator.init(PBEParametersGenerator.PKCS5PasswordToBytes(pwArray),
salt, rounds);
KeyParameter params = (KeyParameter)
generator.generateDerivedParameters(PBKDF2_KEY_SIZE);

return new SecretKeySpec(params.getKey(), "AES");
}

This seems to do the trick, and we can now successfully decrypt and decompress Android backups. Extracting the files is simply a matter of using tar. Looking at the archive contents allows you to extract certain files that are not usually user accessible, including app databases and APK's without rooting your phone. While this is certainly interesting, a more useful scenario would be to restore only a part of the archive by selecting only the apps you need. You can do this by deleting the ones you don't need, repacking the archive and then using adb restore with the resulting file. There are two things to watch out for when repacking though: Android expects a particular ordering of the files, and it doesn't like directory entries in the archive. If the restore process finds a directory entry, it will silently fail, and if files are out of order, some files might be skipped even though the restore activity reports success. In short, simply tarring the unpacked backup directory won't work, so make sure you specify the files to include in the proper order by creating a backup file list and passing to tar with the -T option. The easiest way to create one is to run tar tvf against the decompresed and decrypted original backup. Once you create a proper tar file, you can pack it with the provided utility and feed it to adb restore. Another thing you should be aware of is that if your device is encrypted, you need to specify the same encryption password when packing the archive. Otherwise the restore will silently fail (again, error messages are only output to logcat). Here's how to pack the archive using the provided shell script:

$ ./abe.sh pack repacked.tar repacked.ab password

Full code for the backup pack/unpack utility is on github. Keep in mind that while this code works, it has very minimal error checking and might not cover all possible backup formats. If it fails for some reason, expect a raw stack trace rather than a friendly message. Most of this code comes straight from Android's BackupManagerService.java with (intentionally) minor modifications. If you find an error, feel free to fork it and send me a pull request with the fix.

Hanzi Recognizer v2.2 Released

$
0
0
A new release of Hanzi Recognizer is now available on Google Play. The new version features various UI improvements, a couple of search enhancements and support for the newest version of the eSpeak TTS engine.

As my otherapps, Hanzi Recognizer is now officially free from context menus. All contextual actions are implemented as action modes, in line with the latest Android design guidelines. If you long-press a list items, it will be highlighted, and contextual actions will be shown in the action bar. Here's how selecting a dictionary entry in the search result list looks like:


Another Android design pattern implemented in the new version is the split action bar. On devices with narrow screens (mostly handsets), only two action items can be shown in the top action bar. The rest are stashed in the overflow menu, which poses a usability problem when all of the actions are equally used. To solve this, Hanzi Recognizer now uses a split action bar in the favorites and history screen which lets us display all actions side by side.  Additionally, filtering by entry type (single character or compound) is now supported for both search history and favorites.


Sharing has also been improved by integrating a share action provider. Share targets are now displayed in a submenu, and the most recently used target app's icon is shown in the action bar for quick access. Here's how this looks like in the dictionary entry details screen:


Dictionary entries now have an associated 'Look up all characters' action, available via a long press on a search result item (see first screenshot above, displayed with a magnifying glass icon), or via the action bar in the compound details screen. Pressing it will bring up a list of all unique characters in the word, letting you quickly check the reading and meaning of each hanzi.

Hanzi Recognzier has supported audio pronunciations of both hanzi and compounds since version 1.7 using the eSpeak text-to-speech engine. However, since the system's TTS interface changed in Android 4.0 (ICS), eSpeak was not available on ICS and thus pronunciations where not supported. Fortunately, this has been corrected with the recently released eSpeak version 1.46. Hanzi Recognizer is now compatible with the latest release and text to speech is available on all supported Android versions (2.2 and later). Note that the eSpeak package name has been changed to 'com.googlecode.eyesfree.espeak' (it's part of the Eyes-free application suite), so previous download links (including those offered by older Hanzi Recognizer releases) are no longer valid. To upgrade, you might need to uninstall the legacy eSpeak version and install the latest one from Google Play (if you have the older version, it should continue to work with Hanzi Recognizer though).

In addition to some bug fixes, the new release has also been internally restructured to make it easier to deploy on multiple app markets. Expect version v2.2 in the Amazon Appstore soon.


Using app encryption in Jelly Bean

$
0
0
The latest Android version, 4.1 (Jelly Bean) was announced last week at Google I/O with a bunch of new features and improvements. One of the more interesting features is app encryption, but there haven't been any details besides the short announcement: 'From Jelly Bean and forward, paid apps in Google Play are encrypted with a device-specific key before they are delivered and stored on the device.'. The lack of details is of course giving rise to guesses and speculations, some people even fear that they will have to repurchase their paid apps when they get a new device. In this article we will look at how app encryption is implemented in the OS,  show how you can install encrypted apps without going through Google Play, and take a peak at how Google Play delivers encrypted apps.

OS support for encrypted apps

The previous version of this article was based on Eclipse framework source packages and binary system images, and was missing a few pieces. As Jelly Bean source has now been open sourced, the discussion below has been revised and is now based on the AOSP code (4.1.1_r1). If you are coming back you might want to re-read this post, focusing on the second part.

Apps on Android can be installed in a few different ways:
  • via an application store (e.g., the Google Play Store, aka Android Market)
  • directly on the phone by opening app files or email attachments (if the 'Unknown sources' options is enabled)
  • from a computer connected through USB by using the adb install SDK command
The first two don't provide any options or particular insight into the underlying implementation, so let's explore the third one. Looking at the adb usage output, we see that the install command has gained a few new options in the latest SDK release:

adb install [-l] [-r] [-s] [--algo <algorithm name> --key <hex-encoded key> 
--iv <hex-encoded iv>] <file>

The --algo, --key and --iv parameters obviously have to do with encrypted apps, so before going into details lets first try to install an encrypted APK. Encrypting a file is quite easy to do using the encOpenSSL commands, usually already installed on most Linux systems. We'll use AES in CBC mode with a 128 bit key (a not very secure one, as you can see below), and specify an initialization vector (IV) which is the same as the key to make things simpler:

$ openssl enc -aes-128-cbc -K 000102030405060708090A0B0C0D0E0F 
-iv 000102030405060708090A0B0C0D0E0F -in my-app.apk -out my-app-enc.apk

Let's check if Android likes our newly encrypted app by trying to install it:

$ adb install --algo 'AES/CBC/PKCS5Padding' --key 000102030405060708090A0B0C0D0E0F 
--iv 000102030405060708090A0B0C0D0E0F my-app-enc.apk
pkg: /data/local/tmp/my-app-enc.apk
Success

The 'Success' output seems promising, and sure enough the app's icon is in the system tray and it starts without errors. The actual apk file is copied in /data/app as usual, and comparing its hash value with our encrypted APK reveals that it's in fact a different file. The hash value is exactly the same as that of the original (unencrytped) APK though, so we can conclude that the APK is being decrytped at install time using the encryption parameters (algorithm, key and IV) we have provided. Let's look into how this is actually implemented. 

The adb install command simply calls the pm Android command line utility which lets us list, install and delete packages (apps). The component responsible for installing apps on Android has traditionally been the PackageManagerService and the pm is just a convenient frontend for it. Apps usually access the package service through the facade class PackageManager. Browsing through its   code and checking for encryption related methods we find this:

public abstract void installPackageWithVerification(Uri packageURI,
IPackageInstallObserver observer, int flags, String installerPackageName,
Uri verificationURI, ManifestDigest manifestDigest,
ContainerEncryptionParams encryptionParams);


The ContainerEncryptionParams class looks especially promising, so let's peek inside:

public class ContainerEncryptionParams implements Parcelable {
private final String mEncryptionAlgorithm;
private final IvParameterSpec mEncryptionSpec;
private final SecretKey mEncryptionKey;
private final String mMacAlgorithm;
private final AlgorithmParameterSpec mMacSpec;
private final SecretKey mMacKey;
private final byte[] mMacTag;
private final long mAuthenticatedDataStart;
private final long mEncryptedDataStart;
}

The adb install parameters we used above neatly correspond to the first three fields of the class. In addition to that, the class also stores MAC related parameters, so it's safe to assume that Android can now check the integrity of application binaries. Unfortunately, the pm command doesn't have any MAC-related parameters (it does actually, but for some reason those are disabled in the current build), so to try out the MAC support we need to call the installPackageWithVerification method directly.

The method is hidden from SDK applications, so the only way to call it from an app is to use reflection. It turns out that most of its parameter classes (IPackageInstallObserver, ManifestDigest and ContainerEncryptionParams) are also hidden, but that's only a minor snag. Android pre-loads framework classes, so even if you app bundles a framework class, the system copy will always be used at runtime. This means that all we have to do to get a handle for the installPackageWithVerification method is add the required classes to the andorid.content.pm package in our app. Once we have a method handle, we just need to instantiate the ContainerEncryptionParams class, providing all the encryption and MAC related parameters. One thing to note is that since our entire file is encrypted, and the MAC is calculated over all of its contents (see below), we specify 0 for both the encrypted and authenticated data start, and the file size as the data end (see sample code). To calculate the MAC value (tag) we once again use OpenSSL:

$ openssl dgst -hmac 'hmac_key_1' -sha1 -hex my-app-enc.apk
HMAC-SHA1(my-app-enc.apk)= 0dc53c04d33658ce554ade37de8013b2cff0a6a5

Note that the dgst command doesn't support specifying the HMAC key using hexadecimal or Base64, so you are limited to ASCII characters. This may not be a good idea for production use, so consider using a real key and calculating the MAC in some other way (using JCE, etc.).

Our app is mostly ready now, but installing apps requires the INSTALL_PACKAGES permission, which is defined with protection level signatureOrSystem. Thus it is granted only to apps signed with the system (ROM) key, or apps installed in the /system partition. Building a Jelly Bean ROM is an interesting excercise, but for now, we'll simply copy our app to /system/app in order to get the necessary permission to install packages (on the emulator or a rooted device). Once this is done, we can install an encrypted app via the PackageManager and Android will both decrypt the APK and verify that the package hasn't been tampered with by comparing the specified MAC tag with value calculated based on the actual file contents. You can test that using the sample application by slightly changing the encryption and MAC parameters. This should result in an install error.


The android.content.pm package has some more classes of interest, such as MacAuthenticatedInputStream and ManifestDigest, but the actual APK encryption and MAC verification is done by the DefaultContainerService$ApkContainer, part of the DefaultContainerService (aka, 'Package Access Helper').

Forward locking

'Forward locking' popped up around the time ringtones, wallpalers and other digital 'goods' started selling on mobile (feature) phones. The name comes from the intention -- stop users from forwarding files they have bought to their friends and family. The main digital content on Android were originally apps, and as paid apps gained popularity, sharing (and later re-selling those) was becoming a problem. Application packages (APKs) have been traditionally world readable on Android, which made extracting apps from even a production device relatively easy. While world-readable app files might sound like a bad idea, it's rooted in Android's open and extensible nature -- third party launchers, widget containers and utility apps can easily inspect APKs to extract icons, widget definitions available intents, etc. In an attempt to lock down paid apps without losing any of the OS flexibility, Android introduced forward locking (aka, 'copy protection'). The idea was to split app packages into two parts -- a world-readable part, containing resources and the manifest (in /data/app), and a package readable only by the system user, containing executable code (in /data/app-private). The code package was protected by file system permissions, and while this made it inaccessible to users on most consumer devices, one only needed to gain root access to be able to extract it. This approach was quickly deprecated, and online Android Licensing (LVL) was introduced as a replacement. This, however, shifted app protection implementation from the OS to app developers, and has had mixed results.

In Jelly Bean, the forward locking implementation has been re-designed and now offers the ability to store APKs in an encrypted container that requires a device-specific key to be mounted at runtime. Let's look into the implementation in a bit more detail.

Jelly Bean implementation

While encrypted app containers as a forward locking mechanism are new to JB, the encrypted container idea has been around since Froyo. At the time (May 2010) most Android devices came with limited internal storage and a fairly large (a few GB) external storage, usually in the form of a micro SD card. To make file sharing easier, external storage was formatted using the FAT filesystem, which lacks file permissions. As a result, files on the SD card could be read and written by anyone (any app). To prevent users from simply copying paid apps off the SD card, Froyo created an encrypted filesystem image file and stored the APK in it when you opted to move the app to external storage. The image was then mounted at runtime using Linux's device-mapper and the system would load the app files from the newly created mount point (one per app). Building on this, JB makes the container EXT4, which allows for permissions. A typical forward locked app's mount point now looks like this:

shell@android:/mnt/asec/org.mypackage-1 # ls -l
ls -l
drwxr-xr-x system system 2012-07-16 15:07 lib
drwx------ root root 1970-01-01 09:00 lost+found
-rw-r----- system u0_a96 1319057 2012-07-16 15:07 pkg.apk
-rw-r--r-- system system 526091 2012-07-16 15:07 res.zip

Here the res.zip holds app resources and is world-readable, while the pkg.apk file which hold the full APK is only readable by the system and the app's dedicated user (u0_a96). The actual app containers are stored in /data/app-asec with filenames in the form pacakge.name-1.asec. ASEC container management (creating/deleting and mounting/unmounting) is implemented int the system volume daemon (vold) and framework services talk to it by sending commands via a local socket. We can use the vdc utility to manage forward locked apps from the shell:

# vdc asec list
vdc asec list
111 0 com.mypackage-1
111 0 org.foopackage-1
200 0 asec operation succeeded

# vdc asec unmount org.foopackage-1
200 0 asec operation succeeded

# vdc asec mount org.foopackage-1 000102030405060708090a0b0c0d0e0f 1000
org.foopackage-1 000102030405060708090a0b0c0d0e0f 1000
200 0 asec operation succeeded

# vdc asec path org.foopackage-1
vdc asec path org.foopackage-1
211 0 /mnt/asec/org.foopackage-1

All commands take a namespace ID (based on the package name in practice) as a parameter, and for the mount command you need to specify the encryption key and the mount point's owner UID (1000 is system) as well. That about covers how apps are stored and used, what's left is to find out the actual encryption algorithm and the key. Both are unchanged from the original Froyo apps-to-SD implementation: Twofish with a 128-bit key stored in /data/misc/systemkeys:

shell@android:/data/misc/systemkeys # ls
ls
AppsOnSD.sks
shell@android:/data/misc/systemkeys # od -t x1 AppsOnSD.sks
od -t x1 AppsOnSD.sks
0000000 00 01 02 03 04 05 06 07 08 09 0a 0b 0c 0d 0e 0f
0000020

Forward locking an application is triggered by specifying the -l option of the pm install command or specifying the INSTALL_FORWARD_LOCK flag to PackageManager's installPackage* methods (see sample app).

Encrypted apps and Google Play

All of this is quite interesting, but as we have seen, installing apps, encrypted or otherwise, requires system permissions, so it can only be used by custom carrier Android firmware and probably the next version of your friendly CyanogenMod ROM. Currently the only app that takes advantage of the new encrypted apps and forward locking infrastructure is the Play Store (who comes up with those names, really?) Android client. Describing exactly how the Google Play client works would require detailed knowledge of the underlying protocol (which is always a moving target), but a casual look at the newest Android client does reveal a few useful pieces of information. Google Play servers send quite a bit of metadata about the app you are about to download and install, such as download URL, APK file size, version code and refund window. New among those are the EncryptionParams which look very similar to the ContainerEncryptionParams shown above:

class AndroidAppDelivery$EncryptionParams {
private int cachedSize;
private String encryptionKey;
private String hmacKey;
private int version;
}

The encryption algorithm and the HMAC algorithm are always set to 'AES/CBC/PKCS5Padding' and 'HMACSHA1', respectively. The IV and the MAC tag are bundled with the encrypted APK in a single blob. Once all parameters are read and verified, they are essentially converted to a ContainerEncryptionParams instance, and the app is installed using the familiar PackageManager.installPackageWithVerification() method. As might be expected, the INSTALL_FORWARD_LOCK flag is set when installing a paid app. The OS takes it from here, and the process is the same as described in the previous section: free apps are decrypted and the APKs end up in /data/app, while an encrypted container in /data/app-asec is created and mounted under /mnt/asec/package.name for paid apps.

So what does all this mean in practice? Google Play can now claim that paid apps are always transferred and stored in encrypted form, and so can your own app distribution channel if you decide to implement it using the app encryption facilities Jelly Bean provides. The apps have to be made available to the OS at some point though, so if you have root access to a running Android device, extracting a forward-locked APK or the container encryption key is still possible, but that is true for all software-based solutions.

Update: while forward locking is making it harder to copy paid apps, it seems its integration with other services still has some issues. As reported by multiple developers and users here, it currently breaks apps that register their own account manager implementation, as well as most paid widgets. This is due to some services being initialized before /mnt/asec is mounted, and thus not being able to access it. A fix is said to be available (no Gerrit link though), and should be released in a Jelly Bean maintenance release.

Update 2: It seems that the latest version of the Google Play client, 3.7.15, installs paid apps with widgets and possibly ones that manage accounts in /data/app as a (temporary?) workaround. The downloaded APK is still encrypted for transfer. For example:

shell@android:/data/app # ls -l|grep -i beautiful
ls -l|grep -i beautiful
-rw-r--r-- system system 6046274 2012-08-06 10:45 com.levelup.beautifulwidgets-1.apk

That's about it for now. Hopefully, more detailed information both about the app encryption OS implementation and design and its usage by Google's Play Store will be available from official sources soon. Until then, get the sample project, fire up OpenSSL and give it a try.

Jelly Bean hardware-backed credential storage

$
0
0
Along with all the user facing new features everyone is talking about, the latest Android release has quite a bit of security improvements under the hood. Of those only app encryption has been properly announced, while the rest remain mostly covered up by upper level APIs. This, of course, is not fair, so let's call them up (the list is probably not exhaustive):
  • RSA and DSA key generation and signatures are now implemented in native code for better performance
  • TLS v1.2 support
  • improved system key store
  • new OpenSSL interface (engine) to the system key store
  • new key management HAL component -- keymaster
  • hardware-backed keymaster implementation on Galaxy Nexus and Nexus 7
The first two features are mostly self-explanatory, but the rest merit some exploration. Let's look into each one in turn.

System key store improvements

As we have already discussed, the system key store in Android is provided by a native daemon that encrypts secrets using a key derived from the device unlock password, stores them on disk and regulates key access based on UID. In ICS and previous versions, the keystore daemon simply stores opaque encrypted blobs and the only meatdata available (UID of owner and key name) was encoded in the file name under which blobs are stored. In Jelly Bean (JB), blobs also have a version field and a type field. The following key types are newly defined:
  • TYPE_GENERIC
  • TYPE_MASTER_KEY
  • TYPE_KEY_PAIR
TYPE_GENERIC is used for key blobs saved using the previous get/put interface, and TYPE_MASTER_KEY is, of course, only used for the key store master key. The newly added TYPE_KEY_PAIR is used for key blobs created using the new GENERATE and IMPORT commands. Before we go into more details, here are the keystore commands added in Jelly Bean:
  • GENERATE
  • IMPORT
  • SIGN
  • VERIFY
  • GET_PUBKEY
  • DEL_KEY
  • GRANT
  • UNGRANT
In order to use a key stored using the pre-JB implementation, we needed to first export the raw key bytes, and then use them to initialize an actual key object. Thus even though the key blob is encrypted on disk, the plain text key eventually needed to be exposed (in memory). The new commands let us generate an RSA key pair and sign or verify data without the key ever leaving the key store. There is however no way to specify key size for generated keys, it is fixed at 2048 bits. There is no restriction for importing keys though, so shorter (or longer keys) can be used as well (confirmed for 512-4096 bit keys). Importing requires that keys are encoded using the PKCS#8 format. The sign operation doesn't do any automatic padding and therefore requires input data to be equal to the RSA key size (it's essentially performs raw RSA encryption using the private key). VERIFY takes the key name, signed data and signature value as input, and outputs the verification result. GET_PUBKEY works as expected -- it returns the public key in X.509 format. As mentioned above, the keystore daemon does access control based on UID, and pre-JB a process could use only a key it had created itself. The new GRANT / UNGRANT commands allow the OS to temporarily allow access to system keys to other processes. The grants are not persisted, so they are lost on restart.

Key store OpenSSL engine

The next addition to Android's security system is the keystore-backed OpenSSL engine (pluggable cryptographic module). It only supports loading of and signing with RSA private keys, but that is usually enough to implement key-based authentication (such as SSL client authentication). This small engine makes it possible for native code that uses OpenSSL APIs to use private keys saved in the system key store without any code modifications. It also has a Java wrapper (OpenSSLEngine), which is used to implement the KeyChain.getPrivateKey() API. Thus all apps that acquire a private key reference via the KeyChain API get the benefit of using the new native implementation.

keymaster module overview

And finally, time for our feature presentation -- the keymaster module and its hardware-based implementation on Galaxy Nexus (and Nexus 7, but that currently has no relevant source code in AOSP, so we will focus on the GN). Jelly Bean introduces a new libhardware (aka HAL) module, called keymaster. It defines structures and methods for generating keys and signing/verifying data. The keymaster module is meant to decouple Android from the actual device security hardware, and a typical implementation would use a vendor-provided library to communicate with the crypto-enabled hardware. Jelly Bean comes with a default softkeymaster module that does all key operations in software only (using the ubiquitous OpenSSL). It is used on the emulator and probably will be included in devices that lack dedicated cryptographic hardware. The currently defined operations are listed below. Only RSA is supported at present.
  • generate_keypair
  • import_keypair
  • sign_data
  • verify_data
  • get_keypair_public
  • delete_keypair
  • delete_all
If those look familiar, this is because they are pretty much the same as the newly added keystore commands listed in the previous section. All of the asymmetric key operations exposed by the keystore daemon are implemented by calling the system keymaster module. Thus if the keymaster HAL module is backed by a hardware cryptographic device, all upper level commands and APIs that use the keystore daemon interface automatically get to use hardware crypto.

Galaxy Nexus keymaster implementation

Let's look at how this is implemented on Galaxy Nexus, starting from the lowest level, the actual hardware. Galaxy Nexus is built using the Texas Instruments OMAP4460 SoC, which integrates TI's M-Shield (not to be confused with nShield) mobile security technology. Among other things, M-Shield provides cryptographic acceleration, a secure random number generator and secure on-chip key storage. On top of that sits TI's Security Middleware Component (SMC), which is essentially a Trusted Execution Environment (TEE, Global Platform specs and white paper) implementation. The actual software is by Trusted Logic Mobility, marketed under the name Trusted Foundations. Looking at this TI white paper, it looks like secure key storage was planned for ICS (Android 4.0), but apparently, it got pushed to back to Jelly Bean (4.1). Cf. this statement from the white paper: 'Android 4.0 also introduces a new keychain API and underlying encrypted storage that are protected by M-Shield hardware security on the OMAP 4 platform.'.  

With all the buzzwords and abbreviations out of the way, let's say a few words about TEE. As the name implies, TEE is defined as a logical execution environment, separate from the device's main OS, referred to as the REE (Rich Execution Environment). Its purpose is both to protect assets and execute trusted code. It is also required to be protected against certain physical attacks, although the level of protection is typically lower that that of a tamper-resistant module such as a Secure Element (SE). The TEE can host trusted applications (TAs) which utilize the TEE's services via the standardized internal APIs. Those fall under 4 categories:
  • trusted storage
  • cryptographic operations
  • time-related
  • arithmetical (for dealing with big numbers)
Applications running in the REE (the Android OS and apps) can only communicate with TAs via a low level Client API (essentially sending commands and receiving responses synchronously, where the protocol is defined by each TA). The Client API also lets the REE and TA applications share memory in a controlled manner for efficient data transfer.

Finally, let's see how all this is tied together in the GN build of Jelly Bean. A generic PKCS#11 module (libtf_crypto_sst.so) uses the TEE Client API to communicate with a TA that implements hashing, key generation, encryption/decryption, signing/verification and random number generation. Since there doesn't seem to a 'official' name for the TA on the Galaxy Nexus, and its commands map pretty much one-to-one to PKCS#11 interfaces, we will be calling it the 'token TA' from now on. The GN keymaster HAL module calls the PKCS#11 module to implement RSA key pair generation and import, as well as signing and verification. This in turn is used by the keystore daemon to implement the corresponding commands.

However, it turns out that the hardware-backed keymaster module is not in the latest GN build (JRO03C at the time of this writing. Update: according to this commit message, the reason for its being removed is that it has a power usage bug). Fortunately it is quite easy to build it and install it on the device (notice that the keymaster module, for whatever reason, is actually called keystore.so):

$ make -j8 keystore.tuna
$ adb push out/product/maguro/system/lib/hw/keystore.tuna.so /mnt/sdcard
$ adb shell
$ su
# mount -o remount,rw /system
# cp /mnt/sdcard/keystore.tuna.so /system/lib/hw

Then all we need to do is reboot the device to have it load the new module (otherwise it will continue to use the software-only keystore.default.so). If we send a few keystore commands, we see the following output (maybe a bit too verbose for a production device), confirming that cryptographic operations are actually executed by the TEE:

V/TEEKeyMaster(  299): Opening subsession 0x414f2a88
V/TEEKeyMaster(  299): public handle = 0x60011, private handle = 0x60021
V/TEEKeyMaster(  299): Closing object handle 0x60021
V/TEEKeyMaster(  299): Closing object handle 0x60011
V/TEEKeyMaster(  299): Closing subsession 0x414f2a88: 0x0
I/keystore(  299): uid: 10164 action: a -> 1 state: 1 -> 1 retry: 4
V/TEEKeyMaster(  299): tee_sign_data(0x414ea008, 0xbea018fc, 36, 0xbea1195c, 256, 0xbea018c4, 0xbea018c8)
V/TEEKeyMaster(  299): Opening subsession 0x414f2ab8
V/TEEKeyMaster(  299): Found 1 object 0x60011 : class 0x2
V/TEEKeyMaster(  299): Found 1 object 0x60021 : class 0x3
V/TEEKeyMaster(  299): public handle = 0x60011, private handle = 0x60021
V/TEEKeyMaster(  299): tee_sign_data(0x414ea008, 0xbea018fc, 36, 0xbea1195c, 256, 0xbea018c4, 0xbea018c8)
=> 0x414f2838 size 256
V/TEEKeyMaster(  299): Closing object handle 0x60021
V/TEEKeyMaster(  299): Closing object handle 0x60011
V/TEEKeyMaster(  299): Closing subsession 0x414f2ab8: 0x0
I/keystore(  299): uid: 10164 action: n -> 1 state: 1 -> 1 retry: 4

This produces key files in the keystore daemon data directory, bus as you can see in the listing below, they are not large enough to store 2048 bit RSA keys. They only store a key identifier, as returned by the underlying PKCS#11 module. Keys are loaded based on this ID, and signing are verification are preformed within the token TA, without the keys being exported to the REE.

# ls -l /data/misc/keystore/10164*
-rw------- keystore keystore       84 2012-07-12 14:15 10164_foobar
-rw------- keystore keystore       84 2012-07-12 14:15 10164_imported

So where are the actual keys? It turns out they are in the /data/smc/user.bin file. The format is, of course, proprietary, but it would be a safe bet that it is encrypted with a key stored on the SoC (or at least somehow protected by a hardware key). This allows to have practically an unlimited number of keys inside the TEE, without being bounded by the limited storage space on the physical chip.

keymaster usage and performance

Currently installing a PKCS#12 packaged key and certificate via the public KeyChain API (or importing via Settings->Security->Insall from storage) will import the private key into the token TA and getting a private key object using KeyChain.getPrivateKey() will return a reference to the stored key. Subsequent signature operations using this key object will be performed by the token TA and take advantage of the OMAP4 chip's cryptographic hardware. There are currently no public APIs or stock applications that use the generate key functionality, but if you want to generate a key protected by the token TA, you can call android.security.KeyStore.generate() directly (via reflection or by duplicating the class in your project). This API can potentially be used for things like generating a CSR request from a browser and other types of PKI enrollment.

The OMAP4 chip is advertised as having hardware accelerated cryptographic operations, so let's see how RSA key generation, signing and verification measure up against the default Android software implementations:

Average 2048-bit RSA operation speed on Galaxy Nexus
Crypto Provider/OperationKey generationSigningVerification
Bouncy Castle2176.20 [ms]34.60 [ms]1.90 [ms]
OpenSSL2467.40 [ms]29.80 [ms]1.00 [ms]
TEE3487.00 [ms]10.90 [ms]10.60 [ms]

As you can see from the table above, Bouncy Castle and OpensSSL perform about the same, while the TEE takes more time to generate keys (most probably because it's using a hardware RNG, not a PRNG), but signing is about 3 times faster compared to the software implementations. Verification takes about the same time as signing, and is slower than software. It should be noted that this test is not exactly precise: calling the token TA via the keystore daemon causes a lot of TEE client API sessions to be open and closed which has its overhead. Getting more accurate times will require benchmarking using the Client API directly, but the order of the results should be the same.

Summary

To sum things up: Jelly Bean finally has a standard hardware key storage and cryptographic operations API in the keymater HAL module definition. The implementation for each device is hardware-dependent, and the currently available implementations use the TEE Client API on the Galaxy Nexus and Nexus 7 to take advantage of the TEE capabilities of the respective SoC (OMAP4 and Tegra 3). The current interface and implementation only support generating/importing of RSA keys and signing/verification, but will probably be extended in the future with more key types and operations. It is integrated with the system credential storage (managed by the keystore daemon) and allows us to generate, import and use RSA keys protected by the devices's TEE from Android applications.

Certificate blacklisting in Jelly Bean

$
0
0
The last two posts introduced app encryption, the new system key store and a few other security related features introduced in Jelly Bean. Browsing the ASOP code reveals another new feature which sits higher in the security stack than the previously discussed ones -- certificate blacklisting. In this article we will present some details about its implementation and introduce a sample app that allows us to test how blacklisting works in practice.

Why blacklist certificates?

In a perfect world, a working Public Key Infrastructure (PKI) takes care of issuing, distributing and revoking certificates as necessary. All that a system needs to verify the identities of previously unknown machines and users are a few trust anchor certificates. In practice, though, there are number of issues. Those have been known for some time, but the recentbreaches in top-level CAs have shown that the problems and their consequences are far from theoretical. Probably the biggest PKI issue is that revocation of root certificates is not really supported. Most OSes and browsers come with a pre-configured set of trusted CA certificates (dozens of them!) and when a CA certificate is compromised there are two main ways to handle it: 1. tell users to remove it from the trust store; or, 2. issue an emergency update that removes the affected certificate. Expecting users to handle this is obviously unrealistic, so that leaves the second option. Windows modifies OS trust anchors by distributing patches via Windows Update, and browser vendors simply release a new patch version. However, even if an update removes a CA certificate from the system trust store, a user can still install it again, especially when presented with a 'do this, or you can't access this site' ultimatum. To make sure removed trust anchors are not brought back, the hashes of their public keys are added to a blacklist and the OS/browser rejects them even if they are in the user trust store. This approach effectively revokes CA certificates (within the scope of the OS/browser, of course) and takes care of PKI's inability to handle compromised trust anchors. However, it's not exactly ideal: even an emergency update takes some time to prepare, and even after it is out some users won't update right away, no matter how often they are being nagged about it. CA compromises are relatively rare and widely publicized though, so it seems to work OK in practice (for now, at least).

While CA breaches are fairly uncommon, end entity (EE) key compromise occurs much more often. Whether due to a server breach, stolen laptop or a lost smart card, it happens daily. Fortunately, modern PKI systems have been designed with this in mind -- CAs can revoke certificates and publish revocation information in the form of CRLs, or provide online revocation status using OCSP. Unfortunately, this doesn't really work in the real world. Revocation checking generally requires network access to a machine different from the one we are trying to connect to, and as such has a fairly high failure rate. To mitigate this most browsers do their best to fetch fresh revocation information, but if this fails for some reason, they simply ignore the error (soft-fail), or at best show some visual indication that revocation information is not available. To solve this Google Chrome has opted to disable online revocation checks altogether, and now uses its online update mechanism to proactively push revocation information to browsers, without requiring an application update or restart. Thus Chrome can have an up-to-date local cache of revocation information which makes certificate validation both faster and more reliable. This is yet another blacklist (Chrome calls it a 'CRL set'), this time based on information published by each CA. The browser vendor effectively managing revocation data on the user's behalf is quite novel, and not everyone thinks it's a good idea, but it has worked well so far.

Android certificate blacklisting

In Android versions prior to 4.0 (Ice Cream Sandwich, ICS), the system trust store was a single Bouncy Castle key store file. Modifying it without root permissions was impossible and the OS didn't have a supported way to amend it. That meant that adding new trust anchors or removing compromised ones required an OS update. Since, unlike regular desktop OSes, updates are generally handled by carriers and not the OS vendor, they are usually few and far between. What's more, if a device doesn't sell well, it may never get an official update. In practice this means that there are thousands of devices that still trust compromised CAs, or don't trust newer CAs that have issued hundreds of web site certificates. ICS changed this by making the system trust store mutable and adding an UI, as well as an SDK API, that allows for adding and removing trust anchors. This didn't quite solve PKI's number one problem though -- aside from the user manually disabling a comprised trust anchor, an OS update was still required to blacklist a CA certificate. Additionally, Android does not perform online revocation checks when validating certificate chains, so there was no way to detect compromised end entity certificates, even if they have been revoked.

This finally leads us to the topic of the article -- Android 4.1 (Jelly Bean, JB) has taken steps to allow for online update of system trust anchors and revocation information by introducing certificate blacklists. There are now two system blacklists:
  • a public key hash blacklist (to handle compromised CAs)
  • a serial number blacklist (to handle compromised EE certificates)
The certificate chain validator component takes those two lists in consideration when verifying web site or user certificates. Let's look at how this implemented in a bit more detail.

Android uses a content provider to store OS settings in a system databases. Some of those settings can be modified by third party apps holding the necessary permissions, while some are reserved for the system and can only be changed by going through the system settings UI, or by another system application. The latter are known as 'secure settings'. Jelly Bean adds two new secure settings under the following URIs:
  • content://settings/secure/pubkey_blacklist
  • content://settings/secure/serial_blacklist
As the names imply, the first one stores public key hashes of compromised CAs and the second one a list of EE certificate serial numbers. Additionally, the system server now starts a CertiBlacklister component which registers itself as a ContentObserver for the two blacklist URIs. Whenever a new value is written to those, the CertBlacklister gets notified and writes the value to a file on disk. The format of the files is simple: a comma delimited list of hex-encoded public key hashes or certificate serial numbers. The actual files are:
  • certificate blacklist: /data/misc/keychain/pubkey_blacklist.txt
  • serial number blacklist: /data/misc/keychain/serial_blacklist.txt
Why write them to disk when they are already available in the settings database? Because the component that actually uses the blacklists is a standard Java CertPath API class that doesn't know anything about Android and it's system databases. The actual class, PKIXCertPathValidatorSpi, is part of the Bouncy Castle JCE provider, modified to handle certificate blacklists, which is an Android-specific feature and not defined in the standard CertPath API. The PKIX certificate validation algorithm the class implements is rather complex, but what Jelly Bean adds is fairly straightforward:
  • when verifying an EE (leaf) certificate, check if it's serial number is in the serial number blacklist. If it is, return the same error (exception) as if the certificate has been revoked.
  • when verifying a CA certificate, check if the hash of it's public key is in the public key blacklist. If it is, return the same error as if the certificate has been revoked.
The certificate path validator component is used throughout the whole system, so blacklists affect both applications that use HTTP client classes and the native Android browser and WebView. As mentioned above, modifying the blacklists requires system permissions, so only core system apps can use it. There are no apps in the AOSP source that actually call those APIs, but a good candidate to manage blacklists are the Google services components, available on 'Google experience' devices (i.e., devices with the Play Store client pre-installed). Those manage Google accounts, access to Google services and provide push-style notifications (aka, Google Client Messaging, GCM). Since GCM allows for real-time server-initiated push notifications, it's a safe bet that those will be used to trigger certificate blacklist updates (in fact, some source code comments hint at that). This all sounds good on paper (well, screen actually), but let's see how well it works on a real device. Enough theory, on to

Using Android certificate blacklisting

As explained above, the API to update blacklists is rather simple: essentially two secure settings keys, the values being the actual blacklists in hex-encoded form. Using them requires system permissions though, so our test application needs to either live in /system/app or be signed with the platform certificate. As usual, we choose the former for our tests. A screenshot of the app is shown below.


The app allows us to install a CA certificate to the system trust store (using the KeyChain API), verify a certificate chain (consisting of a the CA certificate and a single EE certificate), add either of the certificates to the system blacklist, and finally clear it so we can start over. The code is quite straightforward, see github repository for details. One thing to note is that it instantiates the low level org.bouncycastle.jce.provider.CertBlacklist class in order to check directly whether modifying the blacklist succeeded. Since this class is not part of the public API, it is accessed using reflection.

Some experimentation reveals that while the CertiBlacklister observer works as expected and changes to the blacklists are immediately written to the corresponding files in /data/misc/keychain, verifying the chain succeeds even after the certificates have been blacklisted. The reason for this is that, as all system classes, the certificate path validator class is pre-loaded and shared across all apps. Therefore it reads the blacklist files only at startup, and a system restart is needed to have it re-read the files. After a restart, validation fails with the expected error: 'Certificate revocation of serial XXXX'. Another issue is that while blacklisting by serial number works as expected, public key blacklisting doesn't appear to work in the current public build (JRO03C on Galaxy Nexus as of July 2012). This is a result of improper handling of the key hash format and will hopefully be fixed in a next JB maintenance release. Update: it is now fixed in AOSP master.

Summary

In Jelly Bean, Android takes steps to get on par with the Chrome browser with respect to managing certificate trust. It introduces features that allow for modifying blacklists dynamically: based on push notifications, and without requiring a system update. While the current implementation has some rough edges and does require a reboot to apply updates, once those are smoothed out, certificate blacklisting will definitely contribute to making Android more resilient to PKI-related attacks and vulnerabilities.

Changing Android's disk encryption password

$
0
0
We've been discussing some of Jelly Bean's newsecurityfeatures, but this post will take a few steps back and focus on an older one that has been available since Honeycomb (3.0), announced in the beginning of the now distant 2011: disk encryption. We'll glance over the implementation, discuss how passwords are managed and introduce a simple tool that lets you change the password from the comfort of Android's UI.

Android disk encryption implementation

Android 3.0 introduced disk encryption along with device administrator policies that can enforce it, and advertised it as one of several 'enhancements for the enterprise'. Of course Honeycomb tablets never really took off, let alone in the enterprise. Disk encryption however persevered and  has been available in all subsequent versions. Now that ICS is on about 16% of all Android devices and Jelly Bean's share will start to increase as well in the coming months, disk encryption might finally see wider adoption.

Unlike most internal Android features, disk encryption has actually been publicly documented quite extensively, so if you are interested in the details, do read the implementation notes. We'll only give a short overview here, focusing on key and password management.

Android's disk encryption makes use of dm-crypt, which is now the standard disk encryption sybsystem in the Linux kernel. dm-crypt maps an encrypted physical block device to a logical plain text one and all reads and writes to it are decrypted/encrypted transparently. The encryption mechanism used for the filesystem in Android is 128 AES with CBC and ESSIV:SHA256. The master key is encrypted with another 128 bit AES key, derived from a user-supplied password using 2000 rounds of PBKDF2 with a 128 bit random salt. The resulting encrypted master key and the salt used in the derivation process are stored, along with other metadata, in a footer structure at the end of the encrypted partition (last 16 Kbytes). This allows for changing the decryption password quickly, since the only thing that needs to be re-encrypted with the newly derived key is the master key (16 bytes).

The user-mode part of disk encryption is implemented in the cryptfs module of Android's volume daemon (vold). crypfs has commands for both creating and mounting an encrypted partition, as well as for verifying and changing the master key encryption password. Android system services communicate with cryptfs by sending commands to vold through a local socket, and it in turn sets system properties that describe the current state of the encryption or mount process. This results in a fairly complex boot procedure, described in detail in the implementation notes. We are however, more interested in how the encryption password is set and managed.

Disk encryption password

When you first encrypt the device, you are asked to either confirm your device unlock PIN/password or set one if you haven't already, or are using the pattern screen lock. This password or PIN is then used to derive the master key encryption key, and you are required to enter it each time you boot the device, then once more to unlock the screen after it starts. As you can see from the screenshot below, Android doesn't have a dedicated setting to manage the encryption password once the device is encrypted: changing the screen lock password/PIN will also silently change the device encryption password.


This is most probably a usability-driven decision: most users would be confused by having to remember and enter two different passwords, at different times, and would probably quickly forget the less often used one (for disk encryption). While this design is good for usability, it effectively forces you to use a simple disk encryption password, since you have to enter it each time you unlock the device, usually dozens of times a day. No one would enter a complex password that many times, and thus most users opt for a simple numeric PIN. Additionally, passwords are limited to 16 characters, so using a passphrase is not an option.

So what's the problem with this? After all, to get to the data on the phone you need to guess the screen unlock password anyway, so why bother with a separate one for disk encryption? Because the two passwords protect your phone against two different types of attack. Most screen lock attacks would be online, brute force ones: essentially someone trying out different passwords on a running device after they get brief access to it. After a few unsuccessful attempts, Android will lock the screen for a few minutes (rate-limiting), then if more failed unlock attempts ensue, completely lock (requiring Google account authentication to unlock) or even wipe the device. Thus even a relatively short screen lock PIN offers adequate protection in most cases. Of course, if someone has physical access to the device or a disk image of it, they can extract password hashes and crack them offline without worrying about rate-limiting or device wiping. This in fact, is the scenario that full disk encryption is designed to protect from: once a device is stolen or confiscated for some reason, the attacker can either brute force the actual device, or copy its data and analyze it even after the device is returned or disposed of. As we mentioned in the previous section, the encrypted master key is stored on disk, and if the password used to derive its encryption key is based on a short numeric PIN, it can be brute forced in seconds, or at worst, minutes. This presentation by viaForensics details one such attack (slides 25-27) and shows that this is far from theoretical and can be achieved with readily available tools. A remote wipe solution could prevent this attack by deleting the master key, which only takes a second and renders the device useless, but this is often not an option, since the device might be offline or turned off.

Hopefully we've established that having a strong disk encryption password is a good idea, but how can we set one without making screen unlocking unusable?

Changing the disk encryption password

As we mentioned in the first section, Android services communicate with the cryptfs module by sending it commands through a local socket. This is of course limited to system applications, but Android comes with a small utility command that can directly communicate with vold and can be used from a root shell. So as long as your phone is rooted, i.e., you have a SUID su binary installed, you can send the following cryptfs command to change the disk encryption password:

$ su -c vdc cryptfs changepw newpass
su -c vdc cryptfs changepw newpass
200 0 0

This doesn't affect the screen unlock password/PIN in any way, and doesn't impose any limits on password length, so you are free to set a complex password or passphrase. The downside is that if you change the screen unlock password, the device encryption one will be automatically changed as well and you will need to repeat the procedure. This is not terribly difficult, but can be cumbersome, especially if you are on the go. You should definitely start this Android issue to have it integrated in Android's system UI (which will probably require extending the device policy as well), but in the meantime you can use my Cryptfs Password tool to easily change the device encryption password.


The app tries to make the process relatively foolproof by first checking your current password and then displaying the new one in a dialog if the change succeeds. However, you will only be required to use the new password at the next boot, so it is important not to forget it until then, and take a full backup just in case. Short of brute-forcing, the only way to recover from a forgotten encryption password is to factory reset the device, deleting all user data in the process, so proceed with caution. The app will verify that you have root access by checking if you have one of the more popular 'superuser' apps (Superuser or SuperSU) installed, and trying to execute a dummy command with su at startup. If your device is not encrypted, it will refuse to start.

The implementation is quite straightforward: it simply invokes the verifypw and changepwcryptfs command using the passwords you provided. If you are interested in the details, or simply won't let a random app mess with your device encryption password, clone the code and build it yourself. If you are the more trusting kind, you can install via Google Play.

Summary

While Android's disk encryption is a useful security feature without any (currently) know flaws, its biggest weakness is that it requires you to use the device unlock PIN or password to protect the disk encryption key. Since those are usually rather short, this opens to door to practical brute force attacks against encrypted volumes. Setting a separate, more complex disk encryption password using the provided tool (or the directly with the vdc command) makes those attack far less effective. This does currently require root access however, so you also need to make sure that your device is otherwise secured as well, mainly by relocking the bootloader, as described in this article

Accessing the embedded secure element in Android 4.x

$
0
0
After discussing credential storage and Android's disk encryption, we'll now look at another way to protect your secrets: the embedded secure element (SE) found in recent devices. In the first post of this three part series we'll give some background info about the SE and show how to use the SE communication interfaces Android 4.x offers. In the second part we'll try sending some actual commands in order to find out more about the SE execution environment. Finally we will discuss Google Wallet and how it makes use of the SE.

What is a Secure Element and why do you want one? 

A Secure Element (SE) is a tamper resistant smart card chip capable of running smart card applications (called applets or cardlets) with a certain level of security and features. A smart card is essentially a minimalistic computing environment on single chip, complete with a CPU, ROM, EEPROM, RAM and I/O port. Recent cards also come equipped with cryptographic co-processors implementing common algorithms such as DES, AES and RSA. Smart cards use various techniques to implement tamper resistance, making it quite hard to extract data by disassembling or analyzing the chip. They come pre-programmed with a  multi-application OS that takes advantage of the hardware's memory protection features to ensure that each application's data is only available to itself. Application installation and (optionally) access is controlled by requiring the use of cryptographic keys for each operation.

The SE can be integrated in mobile devices in various form factors: UICC (commonly known as a SIM card), embedded in the handset or connected to a SD card slot. If the device supports  NFC the SE is usually connected to the NFC chip, making it possible to communicate with the SE wirelessly. 

Smart cards have been around for a while and are now used in applications ranging from pre-paid phone calls and transit ticketing to credit cards and VPN credential storage. Since an SE installed in a mobile device has equivalent or superior capabilities to that of a smart card, it can theoretically be used for any application physical smart cards are currently used for. Additionally, since an SE can host multiple applications, it has the potential to replace the bunch of cards people use daily with a single device. Furthermore, because the SE can be controlled by the device's OS, access to it can be restricted by requiring additional authentication (PIN or passphrase) to enable it. 

So a SE is obviously a very useful thing to have and with a lot of potential, but why would you want to access one from your apps? Aside from the obvious payment applications, which you couldn't realistically build unless you own a bank and have a contract with Visa and friends, there is the possibility of storing other cards you already have (access cards, loyalty cards, etc.) on your phone, but that too is somewhat of a gray area and may requiring contracting the relevant issuing entities. The main application for third party apps would be implementing and running a critical part of the app, such as credential storage or license verification inside the SE to guarantee that it is impervious to reversing and cracking. Other apps that can benefit from being implemented in the SE are One Time Password (OTP) generators and, of course PKI credential (i.e., private keys) storage. While implementing those apps is possible today with standard tools and technologies, using them in practice on current commercial Android devices is not that straightforward. We'll discuss this in detail the second part of the series, but let's first explore the types of SEs available on mobile devices, and the level of support they have in Android. 

Secure Element form factors in mobile devices

As mentioned in the previous section, SEs come integrated in different flavours: as an UICC, embedded or as plug-in cards for an SD card slot. This post is obviously about the embedded SE, but let's briefly review the rest as well. 

Pretty much any mobile device nowadays has an UICC (aka SIM card, although it is technically a SIM only when used on GSM networks) of some form or another. UICCs are actually smart cards that can host applications, and as such are one form of a SE. However, since the UICC is only connected to the basedband processor, which is separate from the application processor that runs the main device OS, they cannot be accessed directly from Android. All communication needs to go through the Radio Interface Layer (RIL) which is essentially a proprietary IPC interface to the baseband. Communication to the UICC SE is carried out using special extended AT commands (AT+CCHO, AT+CCHC, AT+CGLA as defined by 3GPP TS 27.007), which the current Android telephony manager does not support. The SEEK for Android project provides patches that do implement the needed commands, allowing for communicating with the UICC via their standard SmartCard API, which is a reference implementation of the SIMallianceOpen Mobile API specification. However, as most components that talk directly to the hardware in Android, the RIL consists of an open source part (rild), and a proprietary library (libXXX-ril.so). In order to support communication with the UICC secure element, support for this needs to be added to both to rild and to the underlying proprietary library, which is of course up to hardware vendors. The SEEK project does provide a patch that lets the emulator talk directly to a UICC in an external PC/SC reader, but that is only usable for experiments. While there is some talk of integrating this functionality into stock Android (there is even an empty packages/apps/SmartCardService directory in the AOSP tree), there is currently no standard way to communicate with the UICC SE through the RIL (some commercial devices with custom firmware are reported to support it though).

An alternative way to use the UICC as a SE is using the Single Wire Protocol (SWP) when the UICC is connected to a NFC controller that supports it. This is the case in the Nexus S, as well as the Galaxy Nexus, and while this functionality is supported by the NFC controller drivers, it is disabled by default. This is however a software limitation, and people have managed to patch AOSP source to get around it and successfully communicate with UICC. This has the greatest potential to become part of stock Android, however, as of the current release (4.1.1), it is still not available. 

Another form factor for an SE is an Advanced Security SD card (ASSD), which is basically an SD card with an embedded SE chip. When connected to an Android device with and SD card slot, running a SEEK-patched Android version, the SE can be accessed via the SmartCard API. However, Android devices with an SD card slot are becoming the exceptions rather than the norm, so it is unlikely that ASSD Android support will make it to the mainstream.

And finally, there is the embedded SE. As the name implies, an embedded SE is part of the device's mainboard, either as a dedicated chip or integrated with the NFC one, and is not removable. The first Android device to feature an embedded SE was the Nexus S, which also introduced NFC support to Android. Subsequent Nexus-branded devices, as well as other popular handsets have continued this trend. The device we'll use in our experiments, the Galaxy Nexus, is built with NXP's PN65N chip, which bundles a NFC radio controller and an SE (P5CN072, part of NXP's SmartMX series) in a single package (a diagram can be found here).

NFC and the Secure Element

NFC and the SE are tightly integrated in Android, and not only because they share the same silicon, so let's say a few words about NFC. NFC has three standard modes of operation: 
  • reader/writer (R/W) mode, allowing for accessing external NFC tags 
  • peer-to-peer (P2P) mode, allowing for data exchange between two NFC devices 
  • card emulation (CE) mode, which allows the device to emulate a traditional contactless smart card 
What can Android do in each of these modes? The R/W mode allows you to read NDEF tags and  contactless cards, such as some transport cards. While this is, of course, useful, it essential turns your phone into a glorified card reader. P2P mode has been the most demoed and marketed one, in the form of Android Beam. This is only cool the first couple of times though, and since the API only gives you higher-level access to the underlying P2P communication protocol, its applications are currently limited. CE was not available in the initial Gingerbread release, and was introduced later in order to support Google Wallet. This is the NFC mode with the greatest potential for real-life applications. It allows your phone to be programmed to emulate pretty much any physical contactless card, considerably slimming down your physical wallet in the process.

The embedded SE is connected to the NFC controller through a SignalIn/SignalOut Connection (S2C, standardized as NFC-WI) and has three modes of operation: off, wired and virtual mode. In off mode there is no communication with the SE. In wired mode the SE is visible to the Android OS as if it were a contactless smartcard connected to the RF reader. In virtual mode the SE is visible to external readers as if the phone were a contactless smartcard. These modes are naturally mutually exclusive, so we can communicate with the SE either via the contactless interface (e.g., from an external reader), or through the wired interface (e.g., from an Android app). This post will focus on using the wired mode to communicate with the SE from an app. Communicating via NFC is no different than reading a physical contactless card and we'll touch on it briefly in the last post of the series.

Accessing the embedded Secure Element

This is a lot of (useful?) information, but we still haven't answered the main question of this entry: how can we access the embedded SE? The bad news is that there is no public Android SDK API for this (yet). The good news is that accessing it in a standard and (somewhat) officially supported way is possible in current Android versions.

Card emulation, and consequently, internal APIs for accessing the embedded SE were introduced in Android 2.3.4, and that is the version Google Wallet launched on. Those APIs were, and remain, hidden from SDK applications. Additionally using them required system-level permissions (WRITE_SECURE_SETTINGS or NFCEE_ADMIN) in 2.3.4 and subsequent Gingerbread releases, as well as in the initial Ice Cream Sandwich release (4.0, API Level 14). What this means is that only Google (for Nexus) devices, and mobile vendors (for everything else) could distribute apps that use the SE, because they need to either be part of the core OS, or be signed with the platform keys, controlled by the respective vendor. Since the only app that made use of the SE was Google Wallet, which ran only on Nexus S (and initially on a single carrier), this was good enough. However, it made it impossible to develop and distribute an SE app without having it signed by the platform vendor. Android 4.0.4 (API Level 15) changed that by replacing the system-level permission requirement with signing certificate (aka, 'signature' in Android framework terms) whitelisting at the OS level. While this still requires modifying core OS files, and thus vendor cooperation, there is no need to sign SE applications with the vendor key, which greatly simplifies distribution. Additionally, since the whiltelist is maintained in a file, it can easily be updated using an OTA to add support for more SE applications.

In practice this is implemented by the NfceeAccessControl class and enforced by the system NfcService. NfceeAccessControl reads the whilelist from /etc/nfcee_access.xml which is an XML file that stores a list of signing certificates and package names that are allowed to access the SE. Access can be granted both to all apps signed by a particular certificate's private key (if no package is specified), or to a single package (app) only. Here's how the file looks like:

<?xml version="1.0" encoding="utf-8"?>
<resources xmlns:xliff="urn:oasis:names:tc:xliff:document:1.2">
<signer android:signature="30820...90">
<package android:name="org.foo.nfc.app">
</package></signer>
</resources>

This would allow SE access to the 'org.foo.nfc.app' package, if it is signed by the specified signer. So the first step to getting our app to access the SE is adding its signing certificate and package name to the nfcee_access.xml file. This file resides on the system partition (/etc is symlinked to /system/etc), so we need root access in order to remount it read-write and modify the file. The stock file already has the Google Wallet certificate in it, so it is a good idea to start with that and add our own package, otherwise Google Wallet SE access would be disabled. The 'signature' attribute is a hex encoding of the signing certificate in DER format, which is a pity since that results in an excessively long string (a hash of the certificate would have sufficed) . We can either add a <debug/> element to the file, install it, try to access the SE and get the string we need to add from the access denied exception, or simplify the process a bit by preparing the string in advance. We can get the certificate bytes in hex format with a command like this:

$ keytool -exportcert -v -keystore my.keystore -alias my_signing_key \
-storepass password|xxd -p -|tr -d '\n'

This will print the hex string on a single line, so you might want to redirect it to a file for easier copying. Add a new <signer> element to the stock file, add your app's package name and the certificate hex string, and replace the original file in /etc/ (backups are always a good idea). You will also need to reboot the device for the changes to take effect, since file is only read when the NfcService starts.

As we said, there are no special permissions required to access the SE in ICS (4.0.3 and above) and Jelly Bean (4.1), so we only need to add the standard NFC permission to our app's manifest. However, the library that implements SE access is marked as optional, and to get it loaded for our app, we need to mark it as required in the manifest with the <uses-library> tag. The AndroidManifest.xml for the app should look something like this:

<manifest xmlns:android="http://schemas.android.com/apk/res/android"
package="org.foo.nfc.app"
android:versionCode="1"
android:versionName="1.0" >
<uses-sdk
android:minSdkVersion="15"
android:targetSdkVersion="16" />

<uses-permission android:name="android.permission.NFC" />

<application
android:icon="@drawable/ic_launcher"
android:label="@string/app_name"
android:theme="@style/AppTheme" >
<activity
android:name=".MainActivity"
android:label="@string/title_activity_main" >
<intent-filter>
<action android:name="android.intent.action.MAIN" />
<category android:name="android.intent.category.LAUNCHER" />
</intent-filter>
</activity>

<uses-library
android:name="com.android.nfc_extras"
android:required="true" />
</application>
</manifest>

With the boilerplate out of the way it is finally time to actually access the SE API. Android doesn't currently implement a standard smart card communication API such as JSR 177 or the Open Mobile API, but instead offers a very basic communication interface in the NfcExecutionEnvironment (NFC-EE) class. It has only three public methods:

public class NfcExecutionEnvironment {
public void open() throws IOException {...}

public void close() throws IOException {...}

public byte[] transceive(byte[] in) throws IOException {...}
}

This simple interface is sufficient to communicate with the SE, so now we just need to get access to an instance. This is available via a static method of the NfcAdapterExtras class which controls both card emulation route (currently only to the SE, since UICC support is not available) and NFC-EE management. So the full code to send a command to the SE becomes:

NfcAdapterExtras adapterExtras = NfcAdapterExtras.get(NfcAdapter.getDefaultAdapter(context));
NfcExecutionEnvironment nfceEe = adapterExtras.getEmbeddedExecutionEnvironment();
nfcEe.open();
byte[] response = nfcEe.transceive(command);
nfcEe.close();

As we mentioned earlier however, com.android.nfc_extras is an optional package and thus not part of the SDK. We can't import it directly, so we have to either build our app as part of the full Android source (by placing it in /packages/apps/), or resort to reflection. Since the SE interface is quite small, we opt for ease of building and testing, and will use reflection. The code to get, open and use an NFC-EE instance now degenerates to something like this:

Class nfcExtrasClazz = Class.forName("com.android.nfc_extras.NfcAdapterExtras");
Method getMethod = nfcExtrasClazz .getMethod("get", Class.forName("android.nfc.NfcAdapter"));
NfcAdapter adapter = NfcAdapter.getDefaultAdapter(context);
Object nfcExtras = getMethod .invoke(nfcExtrasClazz, adapter);

Method getEEMethod = nfcExtras.getClass().getMethod("getEmbeddedExecutionEnvironment",
(Class[]) null);
Object ee = getEEMethod.invoke(nfcExtras , (Object[]) null);
Class eeClazz = se.getClass();
Method openMethod = eeClazz.getMethod("open", (Class[]) null);
Method transceiveMethod = ee.getClass().getMethod("transceive",
new Class[] { byte[].class });
Method closeMethod = eeClazz.getMethod("close", (Class[]) null);

openMethod.invoke(se, (Object[]) null);
Object response = transceiveMethod.invoke(se, command);
closeMethod.invoke(se, (Object[]) null);

We can of course wrap this up in a prettier package, and we will in the second part of the series. What is important to remember is to call close() when done, because wired access to the SE blocks contactless access while the NFC-EE is open. We should now have a working connection to the embedded SE and sending some bytes should produce a (error) response. Here's a first try:

D/SEConnection(27318): --> 00000000
D/SEConnection(27318): <-- 6E00


We'll explain what the response means and show how to send some actually meaningful commands in the second part of the article.

Summary

A secure element is a tamper resistant execution environment on a chip that can execute applications and store data in a secure manner. An SE is found on the UICC of every Android phone, but the platform currently doesn't allow access to it. Recent devices come with NFC support, which is often combined with an embedded secure element chip, usually in the same package. The embedded secure element can be accessed both externally via a NFC reader/writer (virtual mode) or internally via the NfcExecutionEnvironment API (wired mode). Access to the API is currently controlled by a system level whitelist of signing certificates and package names. Once an application is whitelisted, it can communicate with the SE without any other special permissions or restrictions.

Android secure element execution environment

$
0
0
In the previous post we gave a brief introduction of secure element (SE) support in mobile devices and showed how to communicate with the embedded SE in Android 4.x We'll now proceed to sending some actual command to the SE in order to find out more information about its OS and installed applications. Finally, we will discuss options for installing custom applets on the SE.

SE execution environments

The Android SE is essentially a smart card in a different package, so most standards and protocols originally developed for smart cards apply. Let's briefly review the relevant ones.

Smart cards have traditionally been file system-oriented and the main role of the OS was to handle file access and enforce access permissions. Newer cards support a VM running on top of the native OS that allows for the execution of 'platform independent' applications called applets, which make use of a well defined runtime library to implement their functionality. While different implementations of this paradigm exists, by far the most popular one is the Java Card runtime environment (JCRE). Applets are implemented in a restricted version of the Java language and use a subset of the runtime library, which offers basic classes for I/O, message parsing and cryptographic operations. While the JCRE specification fully defines the applet runtime environment, it does not specify how to load, initialize and delete applets on actual physical cards (tools are only provided for the JCRE emulator). Since one of the main applications of smart cards are various payment services, the application loading and initialization (often referred to as 'card personalization') process needs to be controlled and only authorized entities should be able to alter the card's and installed applications' state. A specification for securely managing applets was originally developed by Visa under the name Open Platform, and is now being maintained and developed by the GlobalPlatform (GP) organization under the name 'GlobalPlatform Card Specification' (GPCS). 

The Card Specification, as anything developed by a committee, is quite extensive and spans multiple documents. Those are quite abstract at times and make for a fun read, but the gist is that the card has a mandatory Card Manager component (also referred to as the 'Issuer Security Domain') that offers a well defined interface for card and individual application life cycle management. Executing Card Manager operations requires authentication using cryptographic keys saved on the card, and thus only an entity that knows those keys can change the state of the card (one of OP_READY, INITIALIZED, SECURED, CARD_LOCKED or TERMINATED) or manage applets. Additionally the GPCS defines secure communication protocols (called Secure Channel, SC) that besides authentication offer confidentiality and message integrity when communicating with the card.

SE communication protocols

As we showed in the previous post, Android's interface for communicating with the SE is the byte[] transceive(byte[] command) method of the NfcExecutionEnvironment class. The structure of the exchanged messages, called APDUs  (Application Protocol Data Unit) is defined in the ISO/IEC 7816-4: Organization, security and commands for interchange standard. The reader (also known as a Card Acceptance Device, CAD) sends command APDUs (sometimes referred to as C-APDUs) to the card, comprised of a mandatory 4-byte header with a command class (CLA), instruction (INS) and two parameters (P1 and P2). This is followed by the optional command data length (Lc), the actual data and finally the maximum number of response bytes expected, if any (Le). The card returns a response APDU (R-APDU) with a mandatory status word (SW1 and SW2) and optional response data. Historically, command APDU data has been limited to 255 bytes and response APDU data to 256 bytes. Recent cards and readers support extended APDUs with data length up to 65536 bytes, but those are not always usable, mostly for various compatibility reasons. The lower level  communication between the reader and the card is carried out by one of several transmission protocols, the most widely used ones being T=0 (byte-oriented) and T=1 (block-oriented). Both are defined in ISO 7816-3: Cards with contacts — Electrical interface and transmission protocols. The APDU exchange is not completely protocol-agnostic, because T=0 cannot directly send response data, but only notify the reader of the number of available bytes. Additional command APDUs (GET RESPONSE) need to be sent in order to retrieve the response data.

The original ISO 7816 standards were developed for contact cards, but the same APDU-based communication model is used for contactless cards as well. It is layered on top of the wireless transmission protocol defined by ISO/IEC 14443-4 which behaves much like T=1 for contact cards.

Exploring the Galaxy Nexus SE execution environment

With most of the theory out of the way, it is time to get our hands dirty and finally try to  communicate with the SE. As mentioned in the previous post, the SE in the Galaxy Nexus is a chip from NXP's SmartMX series. It runs a Java Card-compatible operating system and comes with a GlobalPlatform-compliant Card Manager. Additionally, it offers MIFARE Classic 4K emulation and a MIFARE4Mobile manager applet that allows for personalization of the emulated MIFARE tag. The MIFARE4Mobile specification is available for free, but comes with a non-disclosure, no-open-source, keep-it-shut agreement, so we will skip that and focus on the GlobalPlatform implementation. 

As we already pointed out, authentication is required for most of the Card Manager operations. The required keys are, naturally, not available and controlled by Google and their partners. Additionally, a number of subsequent failed authentication attempts (usually 10) will lock the Card Manager and make it impossible to install or remove applets, so trying out different keys is also not an option (and this is a good thing). However, the Card Manager does provide some information about itself and the runtime environment on the card in order to make it possible for clients to adjust their behaviour dynamically and be compatible with different cards. 

Since Java Card/GP is a multi-application environment, each application is identified by an AID (Application Identifier), consisting of a 5-byte RID (Registered Application Provider Identifier or Resource Identifier) and up to 11-byte PIX (Proprietary Identifier eXtension). Thus an AID can be from 5 to 16 bytes long. Before being able to send commands to particular applet it needs to be made active by issuing the SELECT (CLA='00', INS='A4') command with its AID. As all applications, the Card Manager is also identified by an AID, so our first step is to find this out. This can be achieved by issuing an empty SELECT which both selects the Card Manager and returns information about the card and the Issuer Security Domain. An empty select is simply a select without an AID specified, so the command becomes: 00 A4 04 00 00. Let's see what this produces:

--> 00A4040000
<-- 6F658408A000000003000000A5599F6501FF9F6E06479100783300734A06072A86488
6FC6B01600C060A2A864886FC6B02020101630906072A864886FC6B03640B06092A86488
6FC6B040215650B06092B8510864864020103660C060A2B060104012A026E0102 9000

A successful status (0x9000) and a long string of bytes. The format of this data is defined in Chapter 9. APDU Command Reference of the GPCS, and as most things in the smart card world is in TLV (Tag-Length-Value) format. In TLV each unit of data is described by a unique tag, followed by its length in bytes, and finally the actual data. Most structures are recursive, so the data can host another TLV structure, which in turns wraps another, and so on. Parsing this is not terribly hard, but it is not fun either, so we'll borrow some classes from the Java EMV Reader project to make our job a bit easier. You can see the full code in the sample project, but parsing the response produces something like this on a Galaxy Nexus:

SD FCI: Security Domain FCI
AID: AID: a0 00 00 00 03 00 00 00
RID: a0 00 00 00 03 (Visa International [US])
PIX: 00 00 00

Data field max length: 255
Application prod. life cycle data: 479100783300
Tag allocation authority (OID): globalPlatform 01
Card management type and version (OID): globalPlatform 02020101
Card identification scheme (OID): globalPlatform 03
Global Platform version: 2.1.1
Secure channel version: SC02 (options: 15)
Card config details: 06092B8510864864020103
Card/chip details: 060A2B060104012A026E0102


This shows as the AID of the Card Manager (A0 00 00 00 03 00 00 00), the version of the GP implementation (2.1.1) and the supported Secure Channel protocol (SC02, implementation option '15', which translates to: 'Initiation mode explicit, C-MAC on modified APDU, ICV set to zero, ICV encryption for CMAC session, 3 Secure Channel Keys') along with some proprietary data about the card configuration. Using the other GP command that don't require authentication, GET DATA, we can also get some information about the number and type of keys the Card Manager uses. The Key Information Template is marked by tag 'E0', so the command becomes 80 CA 00 E0 00. Executing it produces another TLV structure which when parsed spells this out:

Key: ID: 1, version: 1, type: DES (EBC/CBC), length: 128 bits
Key: ID: 2, version: 1, type: DES (EBC/CBC), length: 128 bits
Key: ID: 3, version: 1, type: DES (EBC/CBC), length: 128 bits
Key: ID: 1, version: 2, type: DES (EBC/CBC), length: 128 bits
Key: ID: 2, version: 2, type: DES (EBC/CBC), length: 128 bits
Key: ID: 3, version: 2, type: DES (EBC/CBC), length: 128 bits

This means that the Card Manager is configured with two versions of one key set, consisting of 3 double length DES keys (3DES where K3 = K1, aka DESede). The keys are used for authentication/encryption (S-ENC), data integrity (S-MAC) and data encryption (DEK), respectively. It is those keys we need to know in order to be able to install our own applets on the SE.

There is other information we can get from the Card Manager, such as the card issuer ID and the card image number, but it is of less interest. It is also possible to obtain information about the card manufacturer, card operating system version and release date by getting the Card Production Life Cycle Data (CPLC). This is done by issuing the GET DATA command with the '9F7F' tag: 80 CA 9F 7F 00. However, most of the CPLC data is encoded using proprietary tags and IDs so it is not very easy to read anything but the card serial number. Here's the output from a Galaxy Nexus:

CPLC
IC Fabricator: 4790
IC Type: 5044
Operating System Provider Identifier: 4791
Operating System Release Date: 0078
Operating System Release Level: 3300
IC Fabrication Date: 1017
IC Serial Number: 082445XX
IC Batch Identifier: 4645
IC ModuleFabricator: 0000
IC ModulePackaging Date: 0000
ICC Manufacturer: 0000
IC Embedding Date: 0000
Prepersonalizer Identifier: 1726
Prepersonalization Date: 3638
Prepersonalization Equipment: 32343435
Personalizer Identifier: 0000
Personalization Date: 0000
Personalization Equipment: 00000000

Getting an applet installed on the SE

No, this section doesn't tell you how to recover the Card Manager keys, so if that's what you are looking for, you can skip it. This is mostly speculation about different applet distribution models Google or carriers may (or may not) choose to use to allow third-party applets on their phones.

It should be clear by now that the only way to install an applet on the SE is to have access to the Card Manager keys. Since Google will obviously not give up the keys to production devices (unless they decide to scrap Google Wallet), there are two main alternatives for third parties that want to use the SE: 'development' devices with known keys, or some sort of an agreement with Google to have their applets approved and installed via Google's infrastructure. With Nexus-branded devices with an unlockable bootloader available on multiple carriers, as well directly from Google (at least in the US), it is unlikely that dedicated development devices will be sold again. That leaves delegated installation by Google or authorized partners. Let's see how this can be achieved.

The need to support multiple applications and load SE applets on mobile devices dynamically has been recognized by GlobalPlatform, and they have come up with, you guessed it, a standard that defines how this can be implemented. It is called Secure Element Remote Application Management and specifies an administration protocol for performing remote management of SE applets on a mobile device. Essentially, it involves securely downloading an applet and necessary provisioning scripts (created by a Service Provider) from an Admin Server, which are then forwarded by an Admin Agent running on the mobile device to the SE. The standard doesn't mandate a particular implementation, but in practice the process is carried out by downloading APDU scripts over HTTPS, which are then sent to the SE using one of the compatible GP secure channel protocols, such as SC02. As we shall see in the next article, a similar, though non-general and proprietary, scheme is already implemented in Google Wallet. If it were generalized to allow the installation of any (approved) applet, it could be used by applications that want to take advantage of the secure element: on first run they could check if the applet is installed, and if not, send a SE provisioning request to the Admin Server. It would then determine the proper Card Manager keys for the target device and prepare the necessary installation scripts. The role of the Admin Agent can be taken by the Google Play app which already has the necessary system permissions to install applications, and would only need to be extended to support SE access and Card Manager communication. As demonstrated by Google Wallet, this is already technologically possible. The difficulties for making it generally available are mostly contractual and/or political.

Since not all NFC-enabled phones with an embedded SE are produced or sold by Google, different vendors will control their respective Card Manager keys, and thus the Admin Server will need to know all of those in order to allow applet installation on all compatible devices. If UICCs are supported as a SE, this would be further complicated by the addition of new players: MNOs. Furthermore, service providers that deal with personal and/or financial information (pretty much all of the ones that matter do) require compliance with their own security standards, and that makes the job of the entity providing the Admin Server that much harder. The proposed solution to this is a neutral broker entity, called a Trusted Service Manager (TSM), that sets up both the required contractual agreements with all parties involved and takes care of securely distributing SE applications to supported mobile devices. The idea was originally introduced by the GSM Association a few years ago, and companies that offer TSM services exist today (most of those were already in the credit card provisioning business). RIM also provides a TSM service for their BlackBerries, but they have the benefit of being the manufacturer of all supported devices.

To sum this up: the only viable way of installing applets on the SE on commercial devices is by having them submitted to and delivered by a distribution service controlled by the device vendor or provided by a third-party TSM. Such a (general purpose) service is not yet available for Android, but is entirely technologically possible. If NFC payments and ticketing using Android do take off, more companies will want to jump on the bandwagon and contactless application distribution services will naturally follow, but this is sort of a chicken-and-egg problem. Even after they do become available, they will most likely deal only with major service providers such as credit card or transportation companies. Update: It seems Google's plan is to let third parties install their transport cards, loyalty cards, etc on the SE, but all under the Google Wallet umbrella, so a general purpose TSM might not be an option, at least for a while.

A more practical alternative for third-party developers is software card emulation. In this mode, the emulated card is not on a SE, but is actually implemented as a regular Android app. Once the NFC chip senses an external reader, it forwards communication to a registered app, which processes it and returns a response which the NFC chip simply relays. This obviously doesn't offer the same security as an SE, but comes with the advantage of not having to deal with MNOs, vendors or TSMs. This mode is not available in stock Android (and is unlikely to make it in the mainstream), but has been integrated into CyanogenMod and there are already commercial services that use it. For more info on the security implications of software card emulation, see this excellent paper.

Summary

We showed that the SE in recent Android phones offers a Java Card-compatible execution environment and implements GlobalPlatform specifications for card and applet management. Those require authentication using secret keys for all operations that change the card state. Because the keys for Android's SE are only available to Google and their partners, it is currently impossible for third parties to install applets on the SE, but that could change if general purpose TSM services targeting Android devices become available.

The final part of the series will look into the current Google Wallet implementation and explore how it makes use of the SE.
Viewing all 50 articles
Browse latest View live